

How to install Windows Subsystem for Linux (WSL) on Windows 11?
Jul 14, 2025 am 01:06 AM
Installing Windows Subsystem for Linux (WSL) on Windows 11 is as follows: 1. Enable the WSL function, automatically enable and install the default distribution through the PowerShell run the wsl --install command or use wsl --install --no-distribution to enable the function only; 2. Restart the computer after the installation is completed to ensure the changes take effect; 3. You can go to the Microsoft Store to install other favorite distributions such as Kali, Alpine, etc.; 4. Set the Linux username and password when you first start; 5. It is recommended to use WSL2, you can view the status and set the default version through the command; 6. Pay attention to path selection, GUI support scheme, and update reset methods when encountering problems. The entire process is simplified and practical, and it can be used stably for a long time after configuration is completed.
Installing Windows Subsystem for Linux (WSL) is not complicated on Windows 11. As long as you follow the steps step by step, you will basically not encounter too many problems. Microsoft has simplified the entire process a lot, and now it only takes a few commands to complete it.
Enable WSL functionality
First you need to enable the WSL feature in the system. This step is necessary, otherwise subsequent operations will not be carried out.
Open PowerShell (right-click the Start menu → select "Windows Terminal (Admin)"), and enter the following command:
wsl --install
This command will automatically enable relevant functions and install the default Linux distribution (usually Ubuntu). If you just want to enable features without installing the system immediately, you can also use:
wsl --install --no-distribution
After executing the command, the system may prompt you to restart the computer. Don't skip this step, restart is to make the changes take effect.
Install your favorite Linux distribution
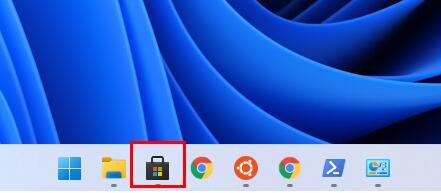
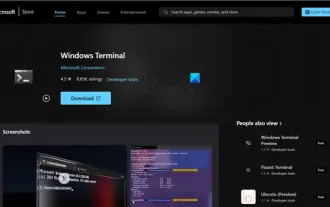
After the installation is completed, Ubuntu will be installed by default. But if you prefer other distributions, such as Debian, Kali, or Fedora, you can search and install them in the Microsoft Store.
Commonly recommended distributions include:
- Ubuntu (highly versatile, suitable for beginners)
- Kali Linux (Security Testing Direction)
- Alpine WSL (lightweight)
- SUSE Linux Enterprise Server (Enterprise User)
After the installation is complete, start it in the Start menu or in the terminal. You will be prompted to create a username and password when it is run for the first time. Note that this is the account information on the Linux system, not from Windows.
Set default version and management options
There are two versions of WSL: WSL1 and WSL2. WSL2 is currently recommended because it supports full Linux kernel features, such as Docker that depends on it.
You can check the current status through the following command:
wsl --list --verbose
If you want to set a distribution to WSL2, you can use:
wsl --set-version <distribution name> 2
for example:
wsl --set-version Ubuntu 2
If you want the newly installed system to use WSL2 by default, you can add this command:
wsl --set-default-version 2
Frequently Asked Questions and Notes
Sometimes you will encounter some minor problems, such as network blockage, file permissions abnormalities, etc. Here are a few error-prone places:
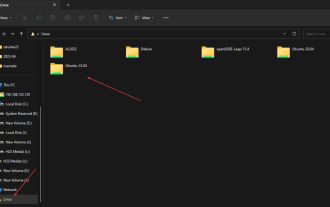
- Path issue : When accessing Windows file system in WSL2 (such as
/mnt/c), performance will be slightly worse and permission control will be inflexible. It is recommended to place the development project in Linux's own directory, such as/home/yourname/project. - Graphic Interface Program : If you plan to run a GUI application, you need to install an additional X Server, or consider using Windows 11's WSLg feature (for Win11 SE and some previews).
- Update and reset : If there is a problem with the system, you can use
wsl --updateto update the core components, or uninstall it withwsl --unregisterand reinstall it.
Basically these are the steps. Although it seems a bit too many, it is really quick to operate. The key is that it can be used for a long time after the first configuration is completed.
The above is the detailed content of How to install Windows Subsystem for Linux (WSL) on Windows 11?. For more information, please follow other related articles on the PHP Chinese website!

Hot AI Tools

Undress AI Tool
Undress images for free

Undresser.AI Undress
AI-powered app for creating realistic nude photos

AI Clothes Remover
Online AI tool for removing clothes from photos.

Clothoff.io
AI clothes remover

Video Face Swap
Swap faces in any video effortlessly with our completely free AI face swap tool!

Hot Article
Hot Tools

Notepad++7.3.1
Easy-to-use and free code editor

SublimeText3 Chinese version
Chinese version, very easy to use

Zend Studio 13.0.1
Powerful PHP integrated development environment

Dreamweaver CS6
Visual web development tools

SublimeText3 Mac version
God-level code editing software (SublimeText3)
Hot Topics


 How to restart WSL using PowerShell, CMD, Task Manager
Feb 19, 2024 pm 04:49 PM
How to restart WSL using PowerShell, CMD, Task Manager
Feb 19, 2024 pm 04:49 PM
WSL or Windows Subsystem for Linux is a built-in feature of Windows 10/11 that allows users to run a Linux environment on Windows systems without the need to dual-boot or use a virtual machine. Restarting WSL is a convenient and efficient way to reboot or reinitialize a Linux instance without restarting the entire system. This article will focus on how to restart WSL through Windows PowerShell, Command Prompt (CMD) and Task Manager. How to Restart WSL using PowerShell, CMD, Task Manager You can use any of the following methods on Windows
 Win11 installation wsl tutorial
Dec 27, 2023 pm 01:45 PM
Win11 installation wsl tutorial
Dec 27, 2023 pm 01:45 PM
Nowadays, many users like to install the wsl subsystem in the win11 system, so that their computers can have multiple operating systems at the same time. However, many friends do not know how to install it. In fact, they can download and install it in the app store. . How to install wsl in win11: 1. First, we click "App Store" in the taskbar (if not, open it in the start menu) 2. After entering, search for "ubuntu" and click on the application in the search results. 3. After entering the details page, click "Install" in the upper right corner. 4. Wait for the software to automatically download and install. After the installation is completed, a dialog box as shown in the figure will pop up. 5. Enter our account and password to use the Linux subsystem in win11
 How to find WSL home directory using Windows GUI?
Sep 15, 2023 pm 01:17 PM
How to find WSL home directory using Windows GUI?
Sep 15, 2023 pm 01:17 PM
WSL (Windows Subsystem for Linux) is a specially created software layer by Microsoft to run Linux binary executables natively on Windows 11 or 10. When you install a Linux distribution on WSL, it creates a Linux environment in Windows with its own file system and home directory. But how do I find this directory using Windows' Graphics File Explorer? If you don’t know, then in this article, we will learn about it. The default home directory for user accounts in WSL is located at /home/<username> and can be accessed using the command line interface of WSL running bash
 WSL tips and tricks to speed up and improve your WSL experience
Mar 01, 2024 am 11:04 AM
WSL tips and tricks to speed up and improve your WSL experience
Mar 01, 2024 am 11:04 AM
WSL is a game-changing tool that allows users to experience a complete Linux environment on a Windows system. However, to make it more efficient, we can't just rely on the default settings. This article will share some suggestions and techniques to speed up and optimize the WSL experience. Best WSL Tips and Tricks Here are some of the best WSL tips and tricks to speed up and improve your WSL experience. Installing a more advanced Windows Terminal in WSL Switching to Z-Shell and OhMyZsh framework Using VSCode in WSL environment on Windows Optimizing Windows Subsystem for Linux2 (WSL2) CPU and Memory Switching to a different distribution Let’s talk about it in detail .
 How do I use VS Code with WSL (Windows Subsystem for Linux)?
Jun 29, 2025 am 12:32 AM
How do I use VS Code with WSL (Windows Subsystem for Linux)?
Jun 29, 2025 am 12:32 AM
VSCode and WSL can achieve Linux development experience on Windows. 1. First make sure that the system supports and installs WSL, run wsl--install to install the default distribution; 2. Create an account and choose to install Ubuntu, Debian or Kali and other distributions; 3. Install VSCode and add the "Remote-WSL" plug-in; 4. Open the WSL environment through the command panel, edit files and run debugging are based on the Linux toolchain; 5. Pay attention to the path using Linux format, the project is stored in the WSL directory, the synchronization editor settings, and adapt to the debug configuration file. As long as the initial setup is correct, you can use the Linux development environment on Windows efficiently.
 How to fix WSL installation failed error in Windows?
Jul 09, 2025 am 12:55 AM
How to fix WSL installation failed error in Windows?
Jul 09, 2025 am 12:55 AM
If you encounter the problem of WSL installation failure, you can usually solve it by enabling features, updating the system, checking the network, or using offline installation. 1. First, make sure to run wsl-install as an administrator in PowerShell or enable Microsoft-Windows-Subsystem-Linux function; 2. Check whether the Windows version is 2004 or above, otherwise upgrade the system; 3. Ensure that the network is normal, you can try to switch the network environment, clear the Store cache, or manually download the distribution installation package; 4. Advanced users can use offline mode to download the .tar.gz file through the official website and execute the wsl-import command to import and install.
 How to install Windows Subsystem for Linux (WSL) on Windows 11?
Jul 14, 2025 am 01:06 AM
How to install Windows Subsystem for Linux (WSL) on Windows 11?
Jul 14, 2025 am 01:06 AM
Install WindowsSubsystem for Linux (WSL) on Windows 11 as follows: 1. Enable the WSL function, automatically enable and install the default distribution through PowerShell or use wsl-install-no-distribution to enable only the functions; 2. Restart the computer after the installation is completed to ensure that the changes take effect; 3. You can go to the Microsoft Store to install other favorite distributions such as Kali, Alpine, etc.; 4. Set the Linux username and password when starting for the first time; 5. It is recommended to use WSL2, you can view the status and set the default version through the command; 6. Encounter
 How to install Windows Subsystem for Linux (WSL)?
Jul 10, 2025 am 11:07 AM
How to install Windows Subsystem for Linux (WSL)?
Jul 10, 2025 am 11:07 AM
The steps to install WindowsSubsystem for Linux (WSL) are as follows: 1. Run PowerShell as an administrator and enter wsl--install to enable WSL and install the default distribution Ubuntu; 2. If the command is invalid, you need to confirm that the system is the Win10/11 version that supports WSL2; 3. After the installation is completed, you need to create a user and password. You can also replace other distributions such as Debian, Kali, etc. through Microsoft Store; 4. Use the wsl--set-version command to set the specified distribution to WSL2. It is recommended to set the default version to WSL2 to improve compatibility; 5. Some computers need to run bcde
