


To solve the problem that the USB or external hard disk cannot be safely unplugged on a Mac, first check the desktop icon popup, Finder popup, docking operation, or uninstall using Disk Tool. 1. Desktop icon pops up: Right-click the disk icon and select "Express" or drag to the "Pop" area next to the Docking Trash; 2. Finder pops up: Find the device in the Finder sidebar and click the "Eject" button; 3. Docking operation: Right-click the device name and select "Express" or drag to the "Eject" area; 4. Force pops up: Close the occupant program or uninstall it through "Disk Utility". Be sure to develop the habit of popping out first and then pulling out to avoid data corruption.

You may have encountered this situation when using a Mac: the inserted USB drive or external hard drive cannot be directly pulled out, and forcibly unplugged may also prompt "in use". At this time, you need to "eject" the disk correctly. Don't worry, the operation is actually very simple, as long as the method is correct, it can be pulled out safely.
Use the desktop icon to pop up
If you can see the icons that plug into the device on your desktop, this is the most intuitive way.
- Click the disk icon on the desktop and select it
- Then right-click and select "Put Up" (or "Pop")
- You can also directly drag the disk icon to the wastebasket on the dock, and that position will become a "pop-up" icon.
It will be safe to unplug the device after the icon disappears. This method is suitable for most ordinary users, especially those who are not very familiar with menu bar operations.
Eject disk via Finder
If you have already opened Finder, you can also operate here:

- Open Finder
- Find your disk device in the left sidebar (usually under "Location" or "External")
- Click the "Pop" button next to the disk name on the right (small triangle icon)
The advantage of this method is that it is not easy to operate incorrectly, and it is especially suitable for connecting multiple devices at the same time.
Quick operation with the program dock
Mac's program docking can actually help you quickly eject disks:
- After plugging in the device, you will see its name appear on the dock
- Right-click the device name → select "Premises"
- Or drag it directly to the "pop-up" area next to the wastebasket
This method is especially suitable for users with mouse operating habits, and the visual feedback is also clear.
Method of forcing pop-up (not recommended for common use)
Sometimes the disk is stuck and the system prompts "The disk is in use". You can try the following method:
- Check if there are any programs that are still accessing files on this disk (such as preview, Photoshop, terminal, etc.)
- Try popping up again after closing the relevant application
- If it still doesn't work, you can use "Disk Utility" to uninstall the disk: Open "Applications → Utility → Disk Utility", select Disk → click "Uninstall"
Try to use this trick as little as possible and only solve the problem of stuck if necessary.
Basically these methods are all. Although simple, what is often overlooked is: don’t plug and pull it out, and you should develop the habit of popping out first and then pulling out , so as to avoid data corruption or device errors.
The above is the detailed content of How to eject a disk on Mac. For more information, please follow other related articles on the PHP Chinese website!

Hot AI Tools

Undress AI Tool
Undress images for free

Undresser.AI Undress
AI-powered app for creating realistic nude photos

AI Clothes Remover
Online AI tool for removing clothes from photos.

Clothoff.io
AI clothes remover

Video Face Swap
Swap faces in any video effortlessly with our completely free AI face swap tool!

Hot Article
Hot Tools

Notepad++7.3.1
Easy-to-use and free code editor

SublimeText3 Chinese version
Chinese version, very easy to use

Zend Studio 13.0.1
Powerful PHP integrated development environment

Dreamweaver CS6
Visual web development tools

SublimeText3 Mac version
God-level code editing software (SublimeText3)
Hot Topics


 How to Save Battery on MacBook? How to Improve It?
Jun 19, 2025 am 10:15 AM
How to Save Battery on MacBook? How to Improve It?
Jun 19, 2025 am 10:15 AM
You’ve had your Mac for a few years, and you’re starting to feel the effects of your device aging—the battery doesn’t hold up as well as it used to. To avoid getting stuck with a dead Mac, you have no choice but to take your charger e
 How to Delete Focus Modes on iPhone & iPad
Jun 18, 2025 am 10:40 AM
How to Delete Focus Modes on iPhone & iPad
Jun 18, 2025 am 10:40 AM
The Focus Modes functionality comes with several pre-set options such as Work, Driving, Sleep, and users are also free to create custom ones for any scenario imaginable. Should you find yourself not needing a multitude of Focus modes—whether because
 How to Automatically Send Messages with Siri from iPhone Without Confirmation
Jun 20, 2025 am 09:40 AM
How to Automatically Send Messages with Siri from iPhone Without Confirmation
Jun 20, 2025 am 09:40 AM
If you trust Siri to accurately transcribe your speech into text and send it as a message, you can activate a setting that lets Siri send messages automatically from your iPhone without asking for confirmation first.With the confirmation feature enab
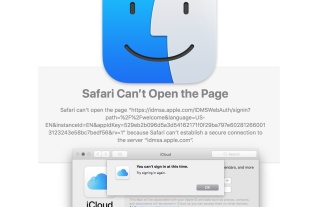 Fix iCloud Errors & “Can’t Establish Secure Connection with idmsa.apple.com” on MacOS Sierra & High Sierra
Jun 22, 2025 am 10:06 AM
Fix iCloud Errors & “Can’t Establish Secure Connection with idmsa.apple.com” on MacOS Sierra & High Sierra
Jun 22, 2025 am 10:06 AM
Some users of Mac computers running MacOS Sierra and MacOS High Sierra have reported issues when trying to log in to an Apple ID or iCloud via System Preferences, as well as problems accessing iCloud.com using Safari. In addition, Safari fails to loa
 Listen to Long Audio Messages Easier on iPhone with This Trick
Jun 23, 2025 am 09:44 AM
Listen to Long Audio Messages Easier on iPhone with This Trick
Jun 23, 2025 am 09:44 AM
Have you ever received a long audio message on your iPhone and while listening, the screen turns off, interrupting the playback and forcing you to start over? It's pretty frustrating, isn't it?Next time you receive a lengthy voice message on your iPh
 7 of the Best iOS 16 Features to Check Out Right Away
Jun 22, 2025 am 09:56 AM
7 of the Best iOS 16 Features to Check Out Right Away
Jun 22, 2025 am 09:56 AM
iOS 16 is now available for iPhone users, offering a solid update packed with practical features you're sure to enjoy.The most noticeable and exciting addition is the ability to personalize your lock screen. However, there are also plenty of smaller
 Data Breach Reports Archive — 2017
Jun 24, 2025 am 09:51 AM
Data Breach Reports Archive — 2017
Jun 24, 2025 am 09:51 AM
In this blog post, we’ve gathered the 22 most significant breaches that happened back in 2017. All of the reports were conducted by Chris Vickery — a data breach hunter, who had partnered with MacKeeper to provide repor
 How to Rename Mac Computer Name in MacOS Sonoma & Ventura
Jun 17, 2025 pm 04:53 PM
How to Rename Mac Computer Name in MacOS Sonoma & Ventura
Jun 17, 2025 pm 04:53 PM
Customizing your Mac by renaming it helps set it apart from other devices, especially when using AirDrop, and makes it easier to identify on a network.In macOS Ventura 13 and later versions, the method for changing the computer name has changed compa
