

How to make a linux iso image from scratch (graphic tutorial)
Jan 06, 2024 pm 10:21 PM
I. Introduction
For a very simplified Linux system, it only requires three parts, which are a Linux kernel, a root file system and boot. The following are the systems and software used in this article to create linux iso images:
OS: ubuntu 20
Software: xorriso
2. Making linux kernel
1. First, you need to go to the official website to select a required version and download it. The official website download address: http://www.miracleart.cn/link/293835c2cc75b585649498ee74b395f5
2. Use tar to decompress it, then enter its directory, and then configure the kernel. Common configurations include the following:
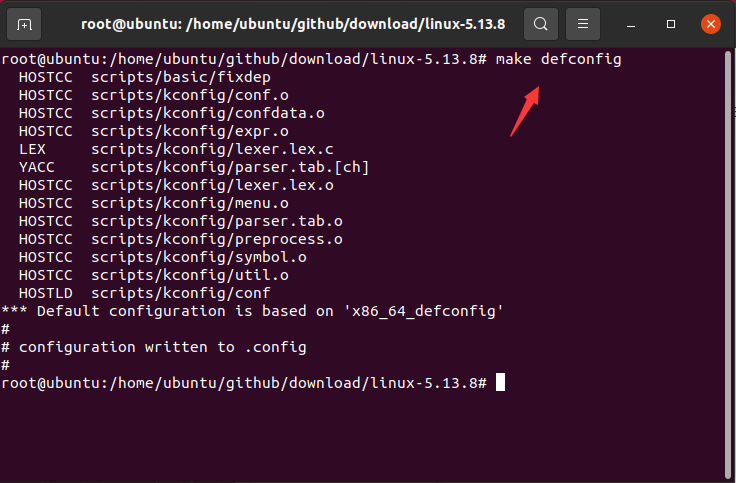
a.make defconfig - default configuration
b. make allyesconfig - Create a configuration that allows you to select yes
c. make allnoconfig - Create a configuration that allows you to select no.
d. make menuconfig - ncurser-based graphical interface configuration
Here you can use the command make defconfig to use the default one, as shown in the figure below:
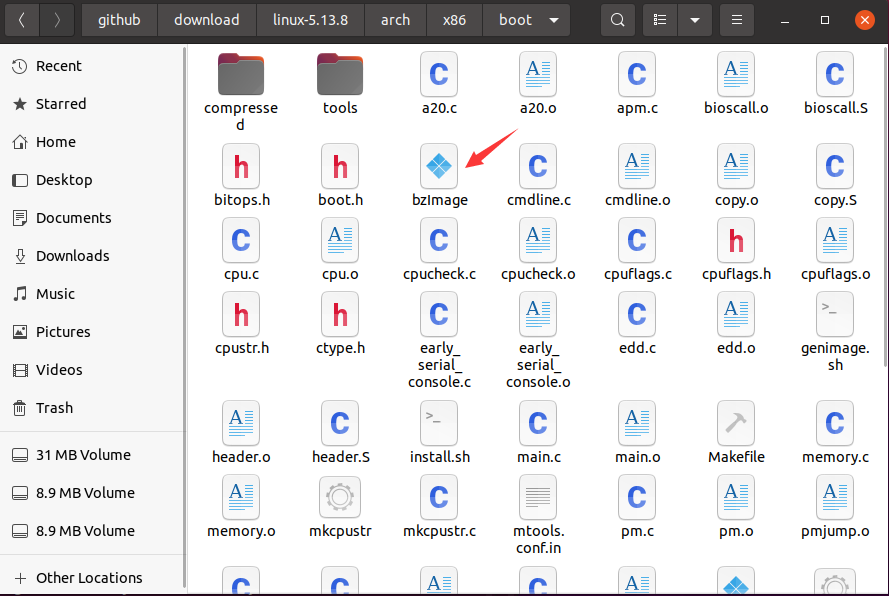
3. Then use the make bzImage command to compile the kernel, as shown in the figure below:

The compiled kernel file is under the corresponding architecture folder of the arch folder, as shown in the following figure:
3. Create root file system
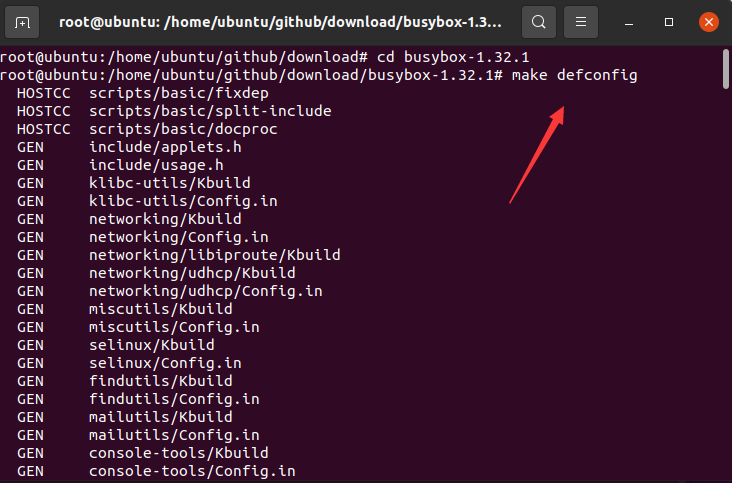
1. We use busybox to create a root file system. busybox can be simply understood as a collection of Linux tools. First, download busybox, official website download address: http://www.miracleart.cn/link/890ff058169b5a1d1a7f07d467f1f57b
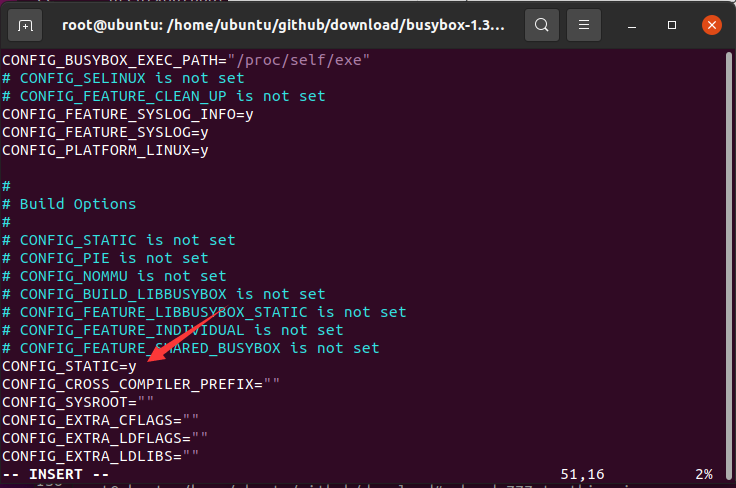
2. The steps for compiling busybox are basically the same as compiling the kernel. Unzip the downloaded compressed package, then enter the folder and use make defconfig to configure the default compilation options. What needs to be noted here is that in the generated . configIn the configuration file, you need to set CONFIG_STATIC=y. If not, just add it, as shown in the figure below:
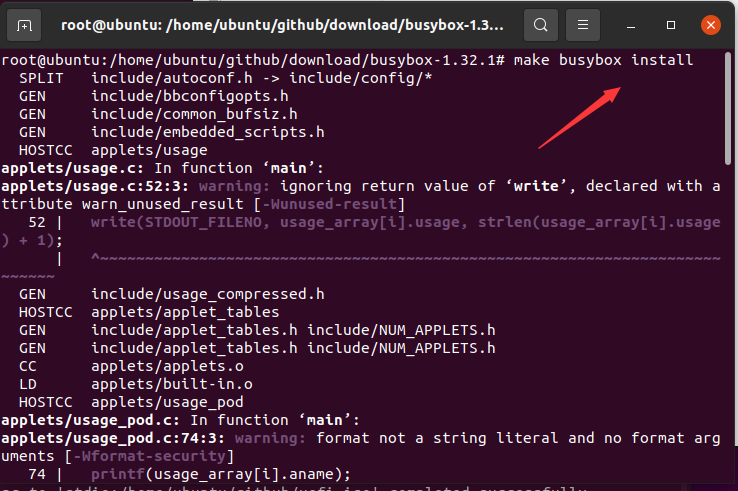
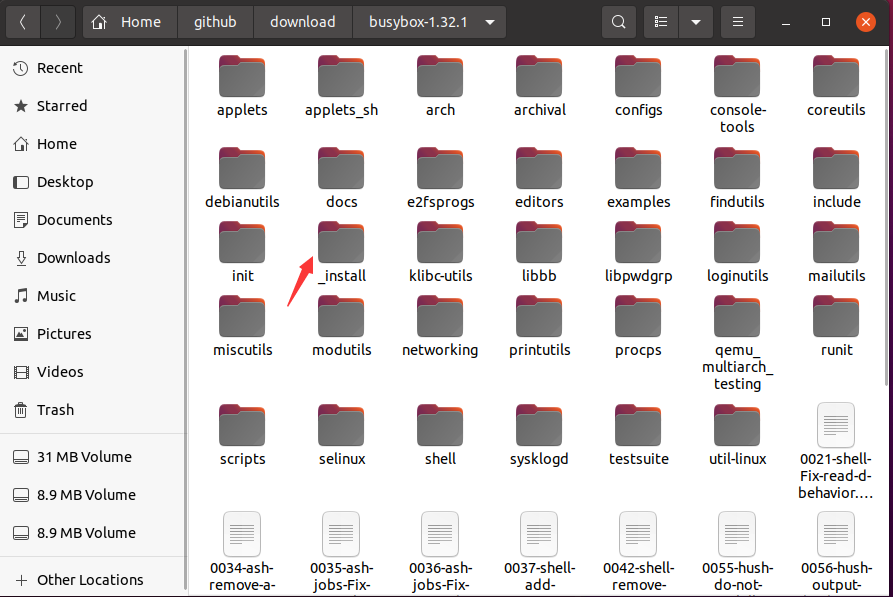
3. Then use the make busybox install command to compile busybox. After compilation, a _install folder will be generated under the current directory, as shown in the following figure:
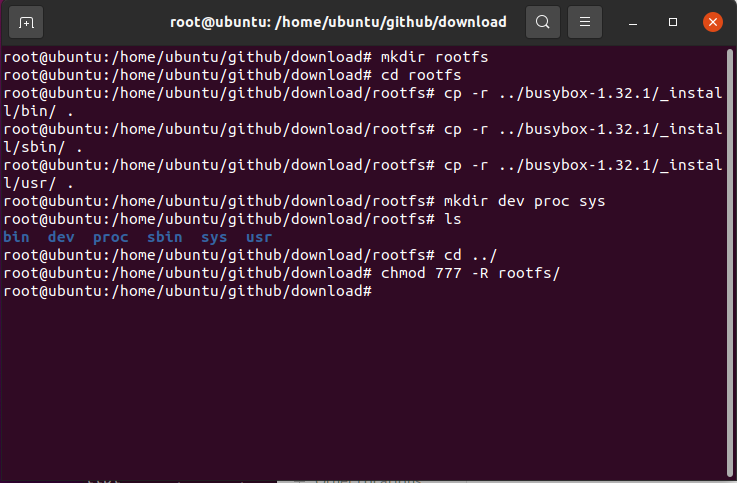
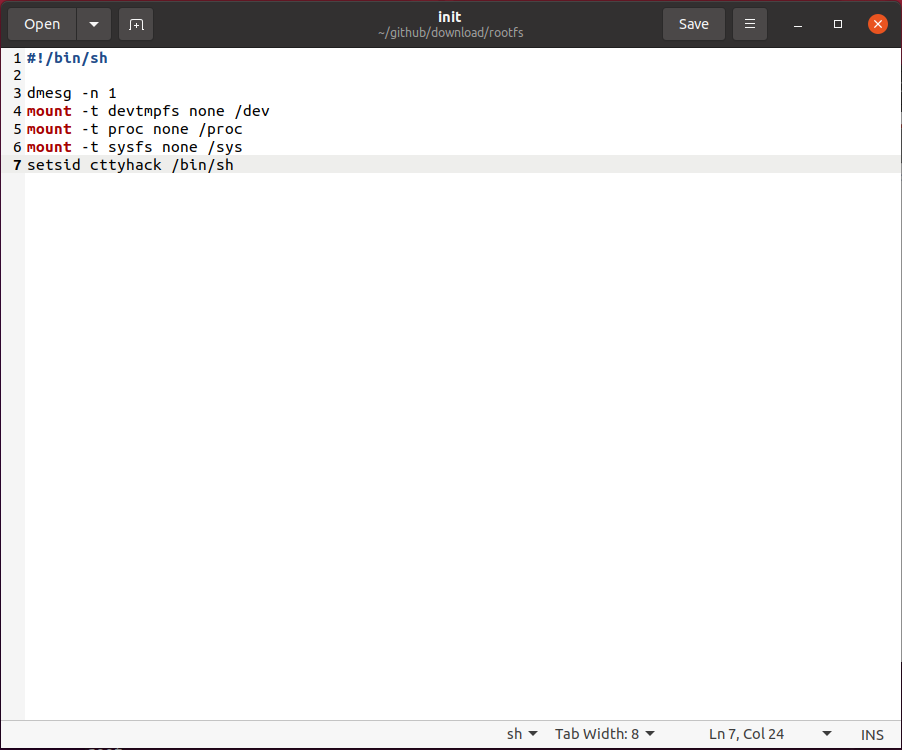
4. Then create a rootfs folder and copy all files and folders under the _install folder except linuxxrc to ## Under the #rootfs folder, finally create folders such as dev, and finally create the init file under the root directory. The file content is as shown below:
find . | cpio -R root:root -H newc -o | gzip > ../rootfs.gz to package the file system. At this point, a file system is created Completed, as shown below:

4. BIOS
1. Here we use syslinux to create a linux iso image guided by bios. The official download address of syslinux is as follows: https:// www.miracleart.cn/link/364c32263dd3f0df5095b65321f3cd79
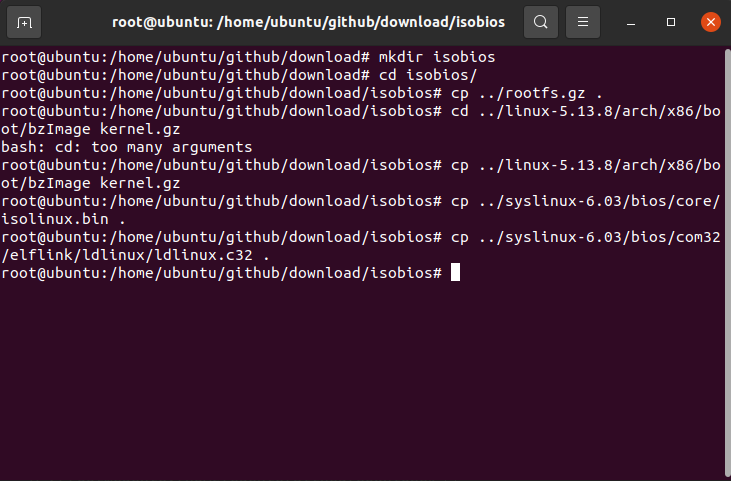
2. Unzip the downloaded syslinux, then create the folder isobios, and put the bios/ under the unzipped syslinux folder core/isolinux.bin, bios/com32/elflink/ldlinux/ldlinux.c32 are copied to the isobios folder, as shown below:
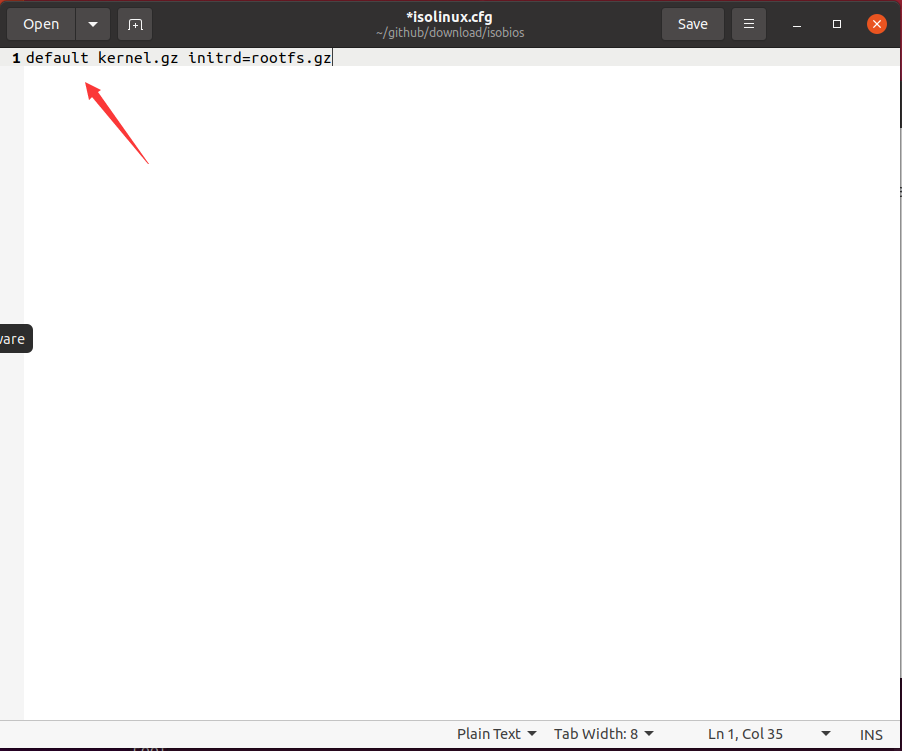
3. Create the configuration file isolinux.cfg under the isobios folder. The file content is as follows:
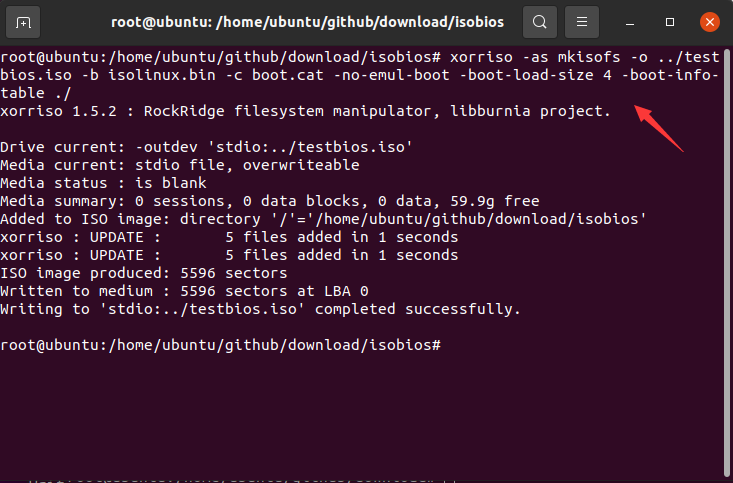
4. Finally, use the command xorriso -as mkisofs -o ../testbios.iso -b isolinux.bin -c boot.cat -no-emul- under the isobios folder boot -boot-load-size 4 -boot-info-table ./Generate iso image file, as shown below:
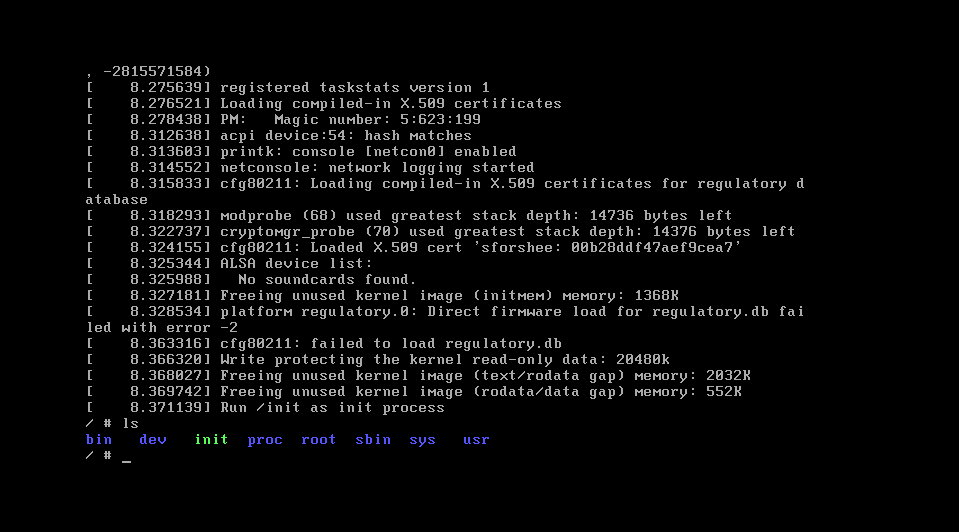
5. Use virtual machine vmware to create a virtual machine. As shown in the figure below, this is how the Linux iso image we created looks like when it is running.
5. UEFI
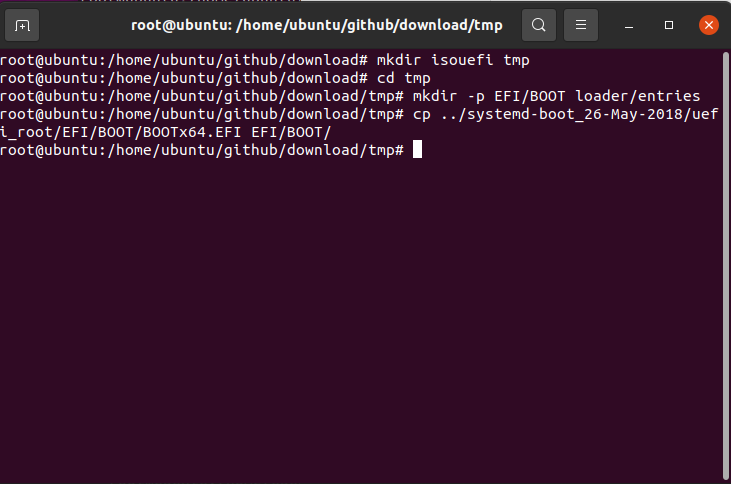
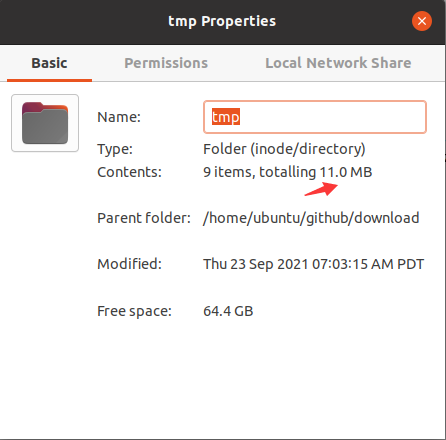
1. uefi is made here using system-boot and syslinux. First, create two folders isouefi and tmp, among them, isouefi is used to mount the device, the tmp folder is used to temporarily store files to calculate the size, and then create ## under the tmp folder #EFI/BOOT and loader/entries directories, then, unzip the systemboot file below uefi_boot/EFI/BOOT/BOOTx64.EFI Copy to the tmp/EFI/BOOT directory, as shown in the figure below:
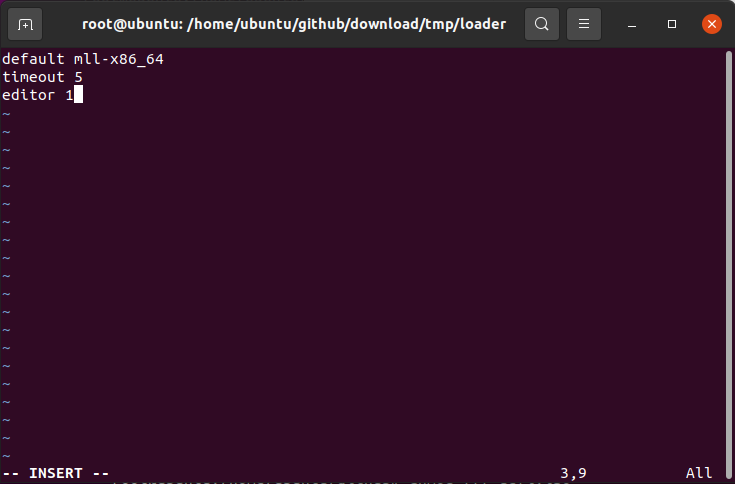
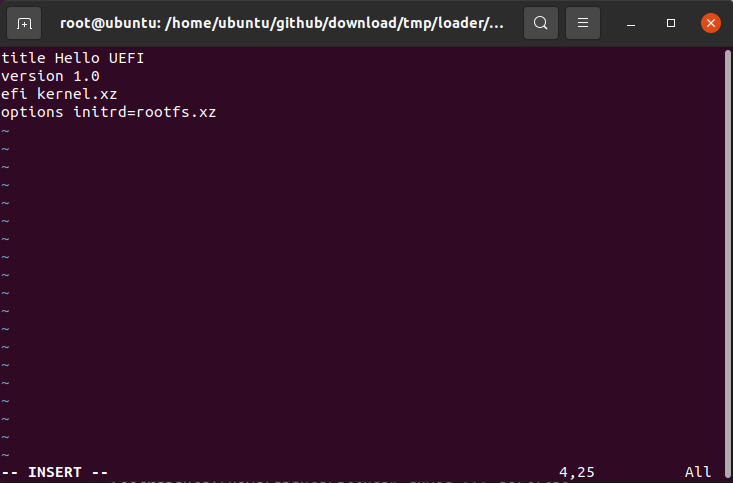
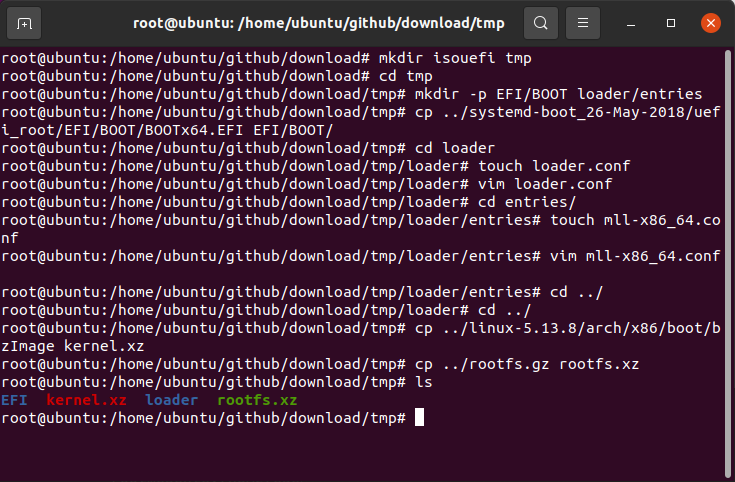
loader.conf configuration file under the tmp/loader directory. The first line indicates that the default configuration is under the entries directory. In that file, the second line sets the default timeout; then create the corresponding configuration file under the entries folder, here is mll-x86_64.conf, the file content and bios is almost the same, so I won’t go into details separately. Finally, copy the kernel and file system prepared previously to the tmp directory, as shown in the following figure:
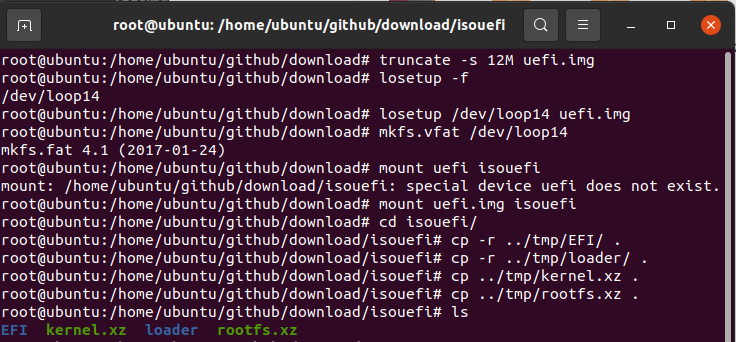
img file of the same size based on the total size of the tmp folder, where tmp is 11M, for the sake of safety, create a img file of 12M, the command is truncate -s 12M uefi.img, and then use The losetup -f command finds a currently unused logical device, then uses the losetup command to virtualize the img file we created earlier into a logical device, and then uses mkfs .vfatFormat the device into the vfat system, then use the mount command to mount it under the isouefi folder, and finally Copy all files and folders under the tmp folder to the isouefi directory, as shown in the following figure:
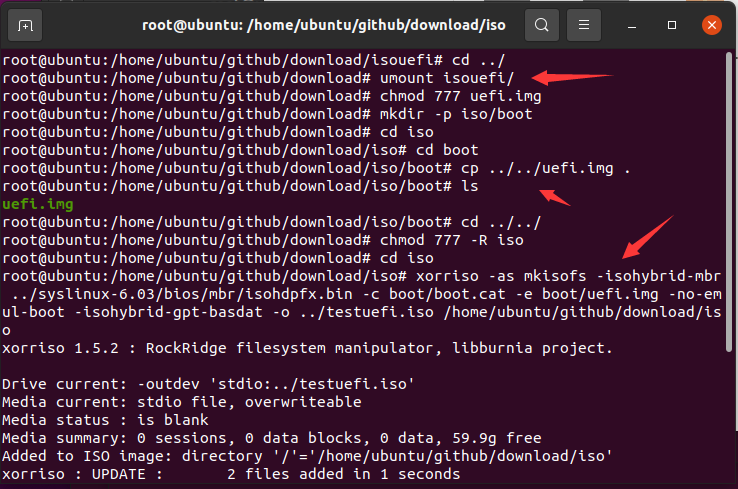
4. Then use the umount command to cancel the mount, so that we get an img containing kernel, file system, etc. file, then create a iso folder, and a boot folder will be created under the folder, and then copy img to iso/ Under boot, finally use the xorriso tool to generate the iso file, as shown in the figure below:
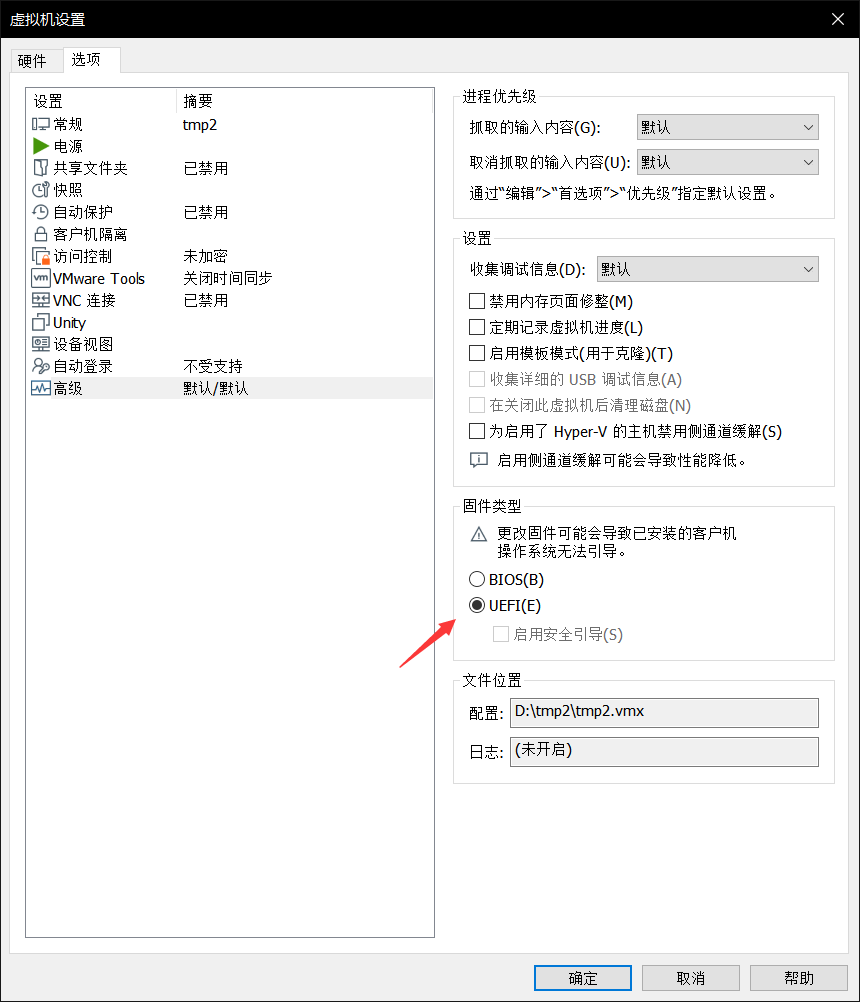
5. Finally, create a new virtual machine, select uefi for boot, and start it, as shown in the figure below:
6. Related links
github link: http://www.miracleart.cn/link/e32c6c0d76c602ec48a1ec030982eb85
The above is the detailed content of How to make a linux iso image from scratch (graphic tutorial). For more information, please follow other related articles on the PHP Chinese website!

Hot AI Tools

Undress AI Tool
Undress images for free

Undresser.AI Undress
AI-powered app for creating realistic nude photos

AI Clothes Remover
Online AI tool for removing clothes from photos.

Clothoff.io
AI clothes remover

Video Face Swap
Swap faces in any video effortlessly with our completely free AI face swap tool!

Hot Article
Hot Tools

Notepad++7.3.1
Easy-to-use and free code editor

SublimeText3 Chinese version
Chinese version, very easy to use

Zend Studio 13.0.1
Powerful PHP integrated development environment

Dreamweaver CS6
Visual web development tools

SublimeText3 Mac version
God-level code editing software (SublimeText3)


 How does the cost of ownership differ between Linux and Windows?
Jun 09, 2025 am 12:17 AM
How does the cost of ownership differ between Linux and Windows?
Jun 09, 2025 am 12:17 AM
Linux's cost of ownership is usually lower than Windows. 1) Linux does not require license fees, saving a lot of costs, while Windows requires purchasing a license. 2) Linux has low hardware requirements and can extend the service life of the device. 3) The Linux community provides free support to reduce maintenance costs. 4) Linux is highly secure and reduces productivity losses. 5) The Linux learning curve is steep, but Windows is easier to use. The choice should be based on specific needs and budget.
 How to install Linux alongside Windows (dual boot)?
Jun 18, 2025 am 12:19 AM
How to install Linux alongside Windows (dual boot)?
Jun 18, 2025 am 12:19 AM
The key to installing dual systems in Linux and Windows is partitioning and boot settings. 1. Preparation includes backing up data and compressing existing partitions to make space; 2. Use Ventoy or Rufus to make Linux boot USB disk, recommend Ubuntu; 3. Select "Coexist with other systems" or manually partition during installation (/at least 20GB, /home remaining space, swap optional); 4. Check the installation of third-party drivers to avoid hardware problems; 5. If you do not enter the Grub boot menu after installation, you can use boot-repair to repair the boot or adjust the BIOS startup sequence. As long as the steps are clear and the operation is done properly, the whole process is not complicated.
 How to enable the EPEL (Extra Packages for Enterprise Linux) repository?
Jun 17, 2025 am 09:15 AM
How to enable the EPEL (Extra Packages for Enterprise Linux) repository?
Jun 17, 2025 am 09:15 AM
The key to enabling EPEL repository is to select the correct installation method according to the system version. First, confirm the system type and version, and use the command cat/etc/os-release to obtain information; second, enable EPEL through dnfinstallepel-release on CentOS/RockyLinux, and the 8 and 9 version commands are the same; third, you need to manually download the corresponding version of the .repo file and install it on RHEL; fourth, you can re-import the GPG key when encountering problems. Note that the old version may not be supported, and you can also consider enabling epel-next to obtain the test package. After completing the above steps, use dnfrepolist to verify that the EPEL repository is successfully added.
 How to choose a Linux distro for a beginner?
Jun 19, 2025 am 12:09 AM
How to choose a Linux distro for a beginner?
Jun 19, 2025 am 12:09 AM
Newbie users should first clarify their usage requirements when choosing a Linux distribution. 1. Choose Ubuntu or LinuxMint for daily use; programming and development are suitable for Manjaro or Fedora; use Lubuntu and other lightweight systems for old devices; recommend CentOSStream or Debian to learn the underlying principles. 2. Stability is preferred for UbuntuLTS or Debian; you can choose Arch or Manjaro to pursue new features. 3. In terms of community support, Ubuntu and LinuxMint are rich in resources, and Arch documents are technically oriented. 4. In terms of installation difficulty, Ubuntu and LinuxMint are relatively simple, and Arch is suitable for those with basic needs. It is recommended to try it first and then decide.
 How to add a new disk to Linux
Jun 27, 2025 am 12:15 AM
How to add a new disk to Linux
Jun 27, 2025 am 12:15 AM
The steps to add a new hard disk to the Linux system are as follows: 1. Confirm that the hard disk is recognized and use lsblk or fdisk-l to check; 2. Use fdisk or parted partitions, such as fdisk/dev/sdb and create and save; 3. Format the partition to a file system, such as mkfs.ext4/dev/sdb1; 4. Use the mount command for temporary mounts, such as mount/dev/sdb1/mnt/data; 5. Modify /etc/fstab to achieve automatic mount on the computer, and test the mount first to ensure correctness. Be sure to confirm data security before operation to avoid hardware connection problems.
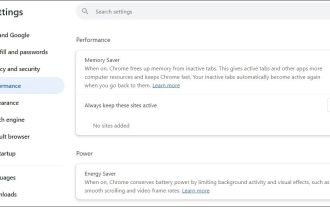 Fixed the failure to upload files in Windows Google Chrome
Jul 08, 2025 pm 02:33 PM
Fixed the failure to upload files in Windows Google Chrome
Jul 08, 2025 pm 02:33 PM
Have problems uploading files in Google Chrome? This may be annoying, right? Whether you are attaching documents to emails, sharing images on social media, or submitting important files for work or school, a smooth file upload process is crucial. So, it can be frustrating if your file uploads continue to fail in Chrome on Windows PC. If you're not ready to give up your favorite browser, here are some tips for fixes that can't upload files on Windows Google Chrome 1. Start with Universal Repair Before we learn about any advanced troubleshooting tips, it's best to try some of the basic solutions mentioned below. Troubleshooting Internet connection issues: Internet connection
 Where are system logs located in Linux?
Jun 24, 2025 am 12:15 AM
Where are system logs located in Linux?
Jun 24, 2025 am 12:15 AM
Logs in Linux systems are usually stored in the /var/log directory, which contains a variety of key log files, such as syslog or messages (record system logs), auth.log (record authentication events), kern.log (record kernel messages), dpkg.log or yum.log (record package operations), boot.log (record startup information); log content can be viewed through cat, tail-f or journalctl commands; application logs are often located in subdirectories under /var/log, such as Apache's apache2 or httpd directory, MySQL log files, etc.; at the same time, it is necessary to note that log permissions usually require s
 What is the sudo command and when should I use it?
Jul 02, 2025 am 12:20 AM
What is the sudo command and when should I use it?
Jul 02, 2025 am 12:20 AM
sudo stands for "substituteuserdo" or "superuserdo", allowing users to run commands with permissions of other users (usually root). Its core uses include: 1. Perform system-level operations such as installing software or editing system files; 2. Accessing protected directories or logs; 3. Manage services such as restarting nginx; 4. Modify global settings such as /etc/hosts. When using it, the system will check the /etc/sudoers configuration and verify the user password, provide temporary permissions instead of continuously logging in as root, ensuring security. Best practices include: only when necessary, avoid blindly executing network commands, editing sudoers files with visudo, and considering continuous operations.
