
 Tutorial sistem
Siri Windows
Cara Memasang .NET Framework 2.0 3.0 dan 3.5 di Windows - Buat teknologi lebih mudah
Tutorial sistem
Siri Windows
Cara Memasang .NET Framework 2.0 3.0 dan 3.5 di Windows - Buat teknologi lebih mudah
Cara Memasang .NET Framework 2.0 3.0 dan 3.5 di Windows - Buat teknologi lebih mudah
May 24, 2025 am 02:04 AM

After upgrading Windows, you might find that certain applications require older versions of the Microsoft .NET framework, which are not included in the latest Windows release. Sometimes, Windows may automatically detect this need and prompt you to install the necessary .NET framework version via a dialog box, but this isn't guaranteed. Continue reading to discover how to manually install the required version of the .NET Framework.
Table of Contents
- Understanding .NET Framework
- Installation via Windows Update
- Manual Installation Using Windows Installation Media
- Direct Installation from Download
- Available Versions of .NET Framework
- Resolving Installation Problems
- Verifying .NET Framework Version
- Common Questions and Answers
Understanding .NET Framework
The Microsoft .NET Framework is a software development platform developed by Microsoft, initially released in 2002. It's open-source and comprises the Command Language Runtime and the Framework Class Library.
This framework simplifies the development of web and software applications across various programming languages. It enables developers to build applications for Windows, Microsoft Azure, Windows Server, and XML Web services on one unified platform.
Installation via Windows Update
You will need an active internet connection for this approach.
- Hit the Win key and enter "Windows Features" in the search field.
- Click on "Turn Windows features on or off" to access the settings dialog.

- Tick the box next to ".NET Framework 3.5 (includes .NET 2.0 and 3.0)" and press "OK." You can keep the other settings unchanged.

Windows will then use Windows Update to install the .NET Framework 3.5 on your system.
You might need to restart your computer to finalize the installation.
Manual Installation Using Windows Installation Media
If you have Windows installation media at hand, you can use it to install older .NET framework versions. This method is faster and does not require an internet connection.
Follow these steps:
- Place your Windows DVD or bootable USB into your computer.
- Open File Explorer, and under "This PC," identify the drive letter of your installation media (e.g., D:).

- Press the Windows key and type cmd in the search field.
- Right-click on Command Prompt and select "Run as administrator."
- Execute the following command, replacing D: with your installation media's drive letter:
<code>Dism /online /enable-feature /featurename:NetFX3 /All /Source:D:sources/sxs /LimitAccess</code>

The installation should complete in a few moments. It's advisable to restart your computer to ensure everything is set up correctly.
Direct Installation from Download
Microsoft provides direct downloads for most .NET Framework versions for manual installation. Versions from 3.5 SP1 to 4.8 are available, although not all are actively supported. Select and download the runtime version you need.

You can also download versions 2.0 and 3.0 directly and find other versions and the latest service packs through the Microsoft Update Catalog.
Available Versions of .NET Framework
While this article focuses on .NET Framework versions 2.0, 3.0, and 3.5, other older versions are also accessible. As of August 2021, the most recent version is .NET Framework 4.8.
The list of available older versions includes:
- .NET Framework 2.0
- .NET Framework 3.0
- .NET Framework 3.5 (installing this version also installs 2.0 and 3.0)
- .NET Framework 4.0
- .NET Framework 4.5
- .NET Framework 4.5.1
- .NET Framework 4.5.2
- .NET Framework 4.6
- .NET Framework 4.6.2
- .NET Framework 4.7
- .NET Framework 4.7.1
- .NET Framework 4.7.2
Resolving Installation Problems
Typically, installing the .NET Framework goes smoothly, but issues can arise. Common problems include:
- Compatibility errors – If you encounter a message stating incompatibility with your OS, the version you're attempting to install isn't supported. Ensure you've installed the latest Windows updates. This issue often occurs when trying to install newer versions on older systems.
- Invalid Windows install – If you're using an unlicensed Windows copy, .NET Framework installation might fail. The solution is to register your Windows or install a valid copy.

- Windows Update issues – If errors mention a specific KB number or that additional updates are required, ensure you've installed all the latest Windows updates before proceeding.
- Corrupted download – If you receive errors about a corrupted installation, check Add or Remove Programs to see if any part was installed. Uninstall if possible, then manually download and install the necessary version.
Microsoft provides further troubleshooting guidance for more complex errors.
Verifying .NET Framework Version
To check if you have the correct .NET Framework version installed, follow these steps:
Using File Explorer
A straightforward method to verify your .NET Framework version is via File Explorer. Navigate to the following path (adjust the drive letter if Windows is installed on a different drive):
<code>C:\Windows\Microsoft.NET\Framework</code>
Each top-level folder represents a different .NET Framework version.

Using PowerShell
Press Win+X and choose Windows PowerShell (Admin). At the prompt, enter:
<code>Get-ChildItem 'HKLM:SOFTWAREMicrosoftNET Framework SetupNDP' -Recurse | Get-ItemProperty -Name version -EA 0 | Where { $_.PSChildName -Match '^(?!S)p{L}'} | Select PSChildName, version</code>
This command will display all installed versions.

Using Command Prompt
Although the output is less formatted, you can use Command Prompt. Open Start, type cmd, and select "Run as administrator" for Command Prompt.
Enter the following command:
<code>reg query "HKLMSOFTWAREMicrosoftNet Framework SetupNDP" /s</code>
Look through the results for the Version line.

For more information on resolving recent Windows update issues, continue reading.
Common Questions and Answers
Can I install multiple versions of .NET Framework?
Yes, you can have multiple .NET Framework versions installed. Different applications may require different versions, and they can coexist on the same system. Only install versions that you need.
How long are .NET Framework versions supported?
.NET Framework 3.5 SP1 is supported until October 10, 2028, making it suitable for applications requiring versions 2.0, 3.0, and/or 3.5. These versions are supported long-term due to their popularity and stability.
Versions 4.0 through 4.5.1 are no longer supported. Versions 4.5.2 through 4.6.1 will lose support on April 26, 2022.
Versions 4.6.2 and later currently have no listed end-of-support date.
How can I check compatibility?
To determine if your PC can support a specific .NET Framework version, check Microsoft's list of dependencies and system requirements for each version.
Atas ialah kandungan terperinci Cara Memasang .NET Framework 2.0 3.0 dan 3.5 di Windows - Buat teknologi lebih mudah. Untuk maklumat lanjut, sila ikut artikel berkaitan lain di laman web China PHP!

Alat AI Hot

Undress AI Tool
Gambar buka pakaian secara percuma

Undresser.AI Undress
Apl berkuasa AI untuk mencipta foto bogel yang realistik

AI Clothes Remover
Alat AI dalam talian untuk mengeluarkan pakaian daripada foto.

Clothoff.io
Penyingkiran pakaian AI

Video Face Swap
Tukar muka dalam mana-mana video dengan mudah menggunakan alat tukar muka AI percuma kami!

Artikel Panas
Alat panas

Notepad++7.3.1
Editor kod yang mudah digunakan dan percuma

SublimeText3 versi Cina
Versi Cina, sangat mudah digunakan

Hantar Studio 13.0.1
Persekitaran pembangunan bersepadu PHP yang berkuasa

Dreamweaver CS6
Alat pembangunan web visual

SublimeText3 versi Mac
Perisian penyuntingan kod peringkat Tuhan (SublimeText3)


 Cara menukar warna fon pada ikon desktop (Windows 11)
Jul 07, 2025 pm 12:07 PM
Cara menukar warna fon pada ikon desktop (Windows 11)
Jul 07, 2025 pm 12:07 PM
Sekiranya anda menghadapi masalah membaca teks ikon desktop anda atau hanya ingin memperibadikan rupa desktop anda, anda mungkin mencari cara untuk menukar warna fon pada ikon desktop di Windows 11. Malangnya, Windows 11 tidak menawarkan mudah terbina dalam
 Memperbaiki Windows 11 Google Chrome Tidak Membuka
Jul 08, 2025 pm 02:36 PM
Memperbaiki Windows 11 Google Chrome Tidak Membuka
Jul 08, 2025 pm 02:36 PM
Tetap Windows 11 Google Chrome Tidak membuka Google Chrome adalah pelayar yang paling popular sekarang, tetapi kadang -kadang ia memerlukan bantuan untuk membuka Windows. Kemudian ikuti arahan di skrin untuk menyelesaikan proses. Selepas melengkapkan langkah -langkah di atas, lancarkan Google Chrome sekali lagi untuk melihat apakah ia berfungsi dengan betul sekarang. 5. Padam Profil Pengguna Chrome Jika anda masih menghadapi masalah, mungkin masa untuk memadam profil pengguna Chrome. Ini akan memadamkan semua maklumat peribadi anda, jadi pastikan anda membuat sandaran semua data yang berkaitan. Biasanya, anda memadam profil pengguna Chrome melalui penyemak imbas itu sendiri. Tetapi memandangkan anda tidak dapat membukanya, inilah cara lain: Hidupkan Windo
 Bagaimana untuk memperbaiki monitor kedua yang tidak dikesan di Windows?
Jul 12, 2025 am 02:27 AM
Bagaimana untuk memperbaiki monitor kedua yang tidak dikesan di Windows?
Jul 12, 2025 am 02:27 AM
Apabila Windows tidak dapat mengesan monitor kedua, periksa terlebih dahulu sama ada sambungan fizikal adalah normal, termasuk bekalan kuasa, pemalam kabel dan keserasian antara muka, dan cuba menggantikan kabel atau penyesuai; Kedua, mengemas kini atau memasang semula pemacu kad grafik melalui pengurus peranti, dan melancarkan versi pemandu jika perlu; kemudian klik secara manual "pengesanan" dalam tetapan paparan untuk mengenal pasti monitor untuk mengesahkan sama ada ia dikenal pasti dengan betul oleh sistem; Akhirnya periksa sama ada sumber input monitor dihidupkan ke antara muka yang sepadan, dan sahkan sama ada port output kad grafik yang disambungkan ke kabel adalah betul. Berikutan langkah-langkah di atas untuk menyemak, kebanyakan masalah pengiktirafan dua skrin biasanya dapat diselesaikan.
 Memperbaiki kegagalan memuat naik fail di Windows Google Chrome
Jul 08, 2025 pm 02:33 PM
Memperbaiki kegagalan memuat naik fail di Windows Google Chrome
Jul 08, 2025 pm 02:33 PM
Ada masalah memuat naik fail di Google Chrome? Ini mungkin menjengkelkan, bukan? Sama ada anda melampirkan dokumen ke e -mel, berkongsi imej di media sosial, atau mengemukakan fail penting untuk kerja atau sekolah, proses muat naik fail yang lancar adalah penting. Jadi, ia boleh mengecewakan jika fail anda memuat naik terus gagal dalam Chrome pada Windows PC. Jika anda tidak bersedia untuk menyerahkan penyemak imbas kegemaran anda, berikut adalah beberapa petua untuk pembetulan yang tidak dapat memuat naik fail pada Windows Google Chrome 1. Mulailah dengan pembaikan sejagat sebelum kita belajar tentang sebarang petua penyelesaian masalah lanjutan, sebaiknya mencuba beberapa penyelesaian asas yang disebutkan di bawah. Penyelesaian Masalah Sambungan Internet: Sambungan Internet
 Mahu membina desktop kerja seharian? Dapatkan PC mini sebaliknya
Jul 08, 2025 am 06:03 AM
Mahu membina desktop kerja seharian? Dapatkan PC mini sebaliknya
Jul 08, 2025 am 06:03 AM
PC mini telah menjalani
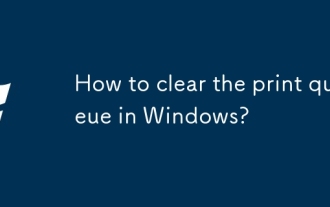 Bagaimana untuk membersihkan barisan cetak di Windows?
Jul 11, 2025 am 02:19 AM
Bagaimana untuk membersihkan barisan cetak di Windows?
Jul 11, 2025 am 02:19 AM
Apabila menghadapi masalah tugas percetakan yang terperangkap, membersihkan giliran cetak dan memulakan semula perkhidmatan printspooler adalah penyelesaian yang berkesan. Pertama, buka antara muka "Peranti dan Pencetak" untuk mencari pencetak yang sepadan, klik kanan tugas dan pilih "Batal" untuk membersihkan tugas tunggal, atau klik "Batal semua dokumen" untuk membersihkan barisan pada satu masa; Jika barisan tidak dapat diakses, tekan Win R untuk memasukkan perkhidmatan.msc untuk membuka senarai perkhidmatan, cari "Printspooler" dan hentikannya sebelum memulakan perkhidmatan. Jika perlu, anda boleh memadam secara manual fail sisa di bawah laluan c: \ windows \ system32 \ spool \ pencetak untuk menyelesaikan masalah sepenuhnya.
 Bolehkah PC mini menggantikan PC desktop anda?
Jul 07, 2025 pm 12:12 PM
Bolehkah PC mini menggantikan PC desktop anda?
Jul 07, 2025 pm 12:12 PM
Kami biasanya melihat Deskto
 Bagaimana untuk menunjukkan sambungan fail dalam Windows 11 File Explorer?
Jul 08, 2025 am 02:40 AM
Bagaimana untuk menunjukkan sambungan fail dalam Windows 11 File Explorer?
Jul 08, 2025 am 02:40 AM
Untuk memaparkan sambungan fail dalam Windows 11 File Explorer, anda boleh mengikuti langkah -langkah berikut: 1. Buka mana -mana folder; 2. Klik tab "Lihat" di bar menu atas; 3. Klik butang "Pilihan" di sudut kanan atas; 4. Beralih ke tab "Lihat"; 5. Tidak hairan "Sembunyikan sambungan untuk jenis fail yang diketahui"; 6. Klik "OK" untuk menyimpan tetapan. Tetapan ini membantu mengenal pasti jenis fail, meningkatkan kecekapan pembangunan, dan menyelesaikan masalah. Jika anda hanya ingin melihat pelanjutan sementara, anda boleh klik kanan fail dan pilih "Namakan semula" dan tekan kekunci ESC untuk keluar, dan tetapan sistem tidak akan diubah.
