

How to disable private browsing mode in Safari on iPhone
Feb 23, 2024 am 08:34 AM
Apple allows iPhone users to browse anonymously using private tabs on the Safari browser. When "Incognito Mode" is enabled, Safari does not save the addresses of websites you visit, your search history, or Autofill information.
If you use private browsing mode frequently in Safari, you may have noticed that the mode operates differently than other browsers. This article will detail how to disable Private Browsing Mode on iPhone and what happens when Private Browsing Mode is enabled when Safari is closed.
How to Disable Private Browsing Mode on Safari
- Required: iPhone running iOS 17 or later.
If you've found a way to enable and use private browsing in Safari but are having trouble trying to disable it, the following instructions may help you.
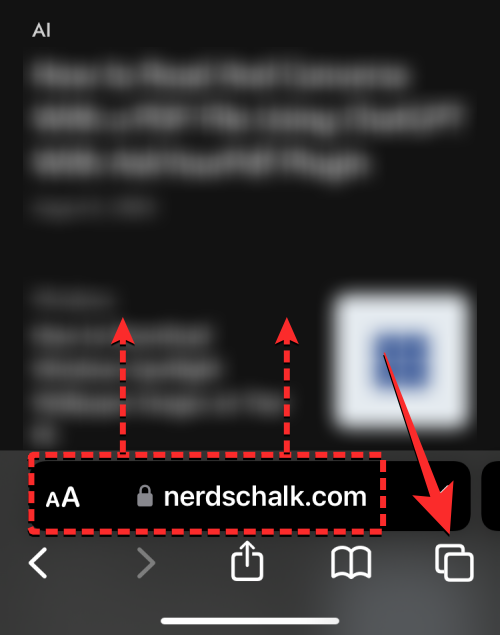
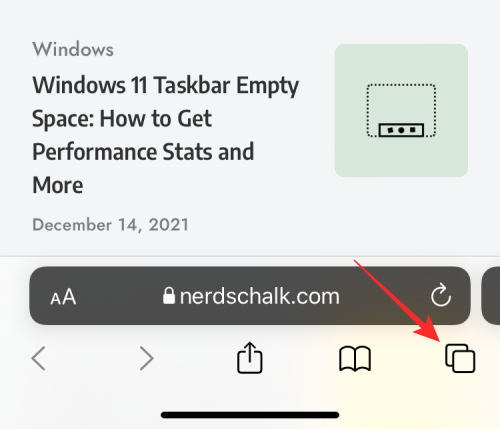
- To switch from private browsing to normal browsing, click the "Tabs" button in the lower right corner or swipe up on the bottom navigation bar.

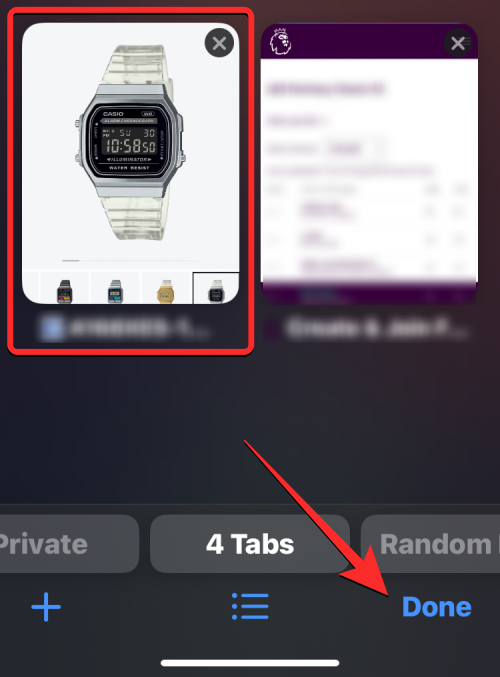
- Once you do this, you will be able to see all the tabs currently open in Private Browsing in Safari. To disable private browsing, you can switch to the regular tab by clicking on the "x" tab option at the bottom. Here, "x" is the number of tabs currently open in regular browsing mode.
- When Safari switches to a regular tab, you can click "Done" in the lower right corner to open the last tab loaded in normal browsing mode, or you can click any of the top tabs tab to open it.
- Another way to disable private browsing on your device is to access the Tab Groups menu in Safari. To do this, click the "Tabs" button in the lower right corner or swipe up on the bottom navigation bar.
- Once you do this, you will be able to see all the tabs currently open in Private Browsing in Safari. To disable private browsing, click the bullet list icon at the bottom center.
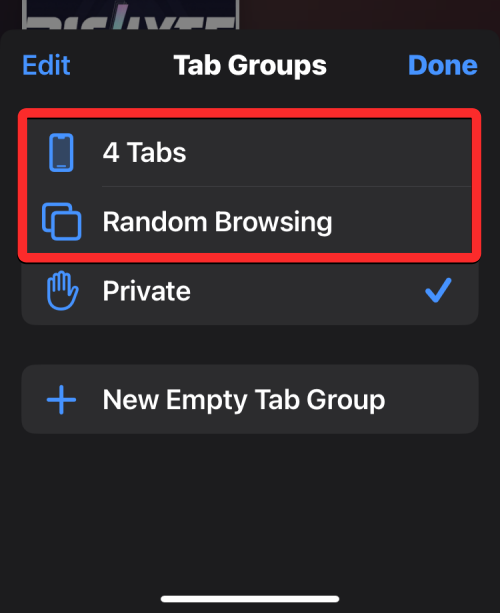
- This will open the Tab Group menu on your screen. Here, click on one of the click groups you created (in this case, "Random browsing" is such an option) or click on the "x" tab option in this menu to open one of the normal browsing tabs.
- From here, you can tap any tab at the top to open it, or tap Done in the bottom right corner to open the last visible tab on the screen.

How to disable private browsing mode on older iOS versions [2 methods]
Since Safari does not close private tabs on iOS by itself , so you can disable private browsing mode on an app by switching from a private tab to a regular active tab. This can be done in two ways – by switching to an open tab in the tab group, or using the shortcut in the Safari tab bar at the bottom.
Method 1: From a tab group
- To disable private browsing mode using a tab group, open the Safari app on your iPhone.
- Now, click on the tab icon in the lower right corner.
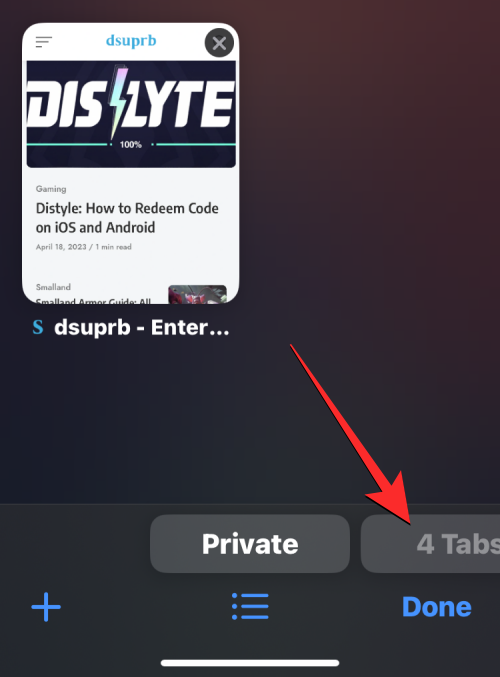
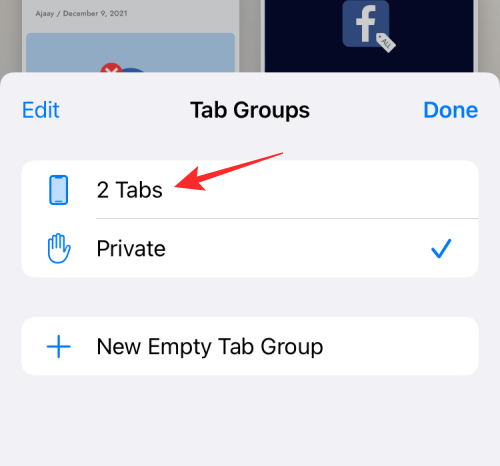
- When the tab overview screen appears, tap the "Private" section at the bottom.
- You will now see the tab group popping up from the bottom. Here, select the "x" tab above the "Private" group. "x" is the number of tabs that may have been open in the last active session.
- You will now switch to the non-private tab that was active before you switched to private browsing on Safari. When you do this, private browsing mode will be disabled.

Method 2: From the tab bar
Another quick way to disable private browsing mode is to switch to a non-private tab from the tab bar.
- Open the Safari browser app on your iPhone.
- Long press the label icon in the lower right corner.
- In the overflow menu that appears, select "x" tabs, where "x" is the number of tabs that may currently be open in a non-private browsing session.
- When you do this, Safari will disable private browsing mode and display the non-private tab you last visited.

How to quickly close Private tabs on Safari
Contrary to what you might expect, disabling private browsing mode on Safari does not necessarily close the tabs open in it . When you switch back to Private tabs from normal tabs, all tabs that were previously loaded in Private Browsing mode will be reloaded on the screen again. This might put you in an awkward position, as turning private browsing mode back on after a few days might cause all the tabs you might have had open before.
To ensure that no one can access your private tabs in the future, be sure to close all private tabs.
- First, open the Safari app on your iPhone and make sure you are currently in private browsing mode.
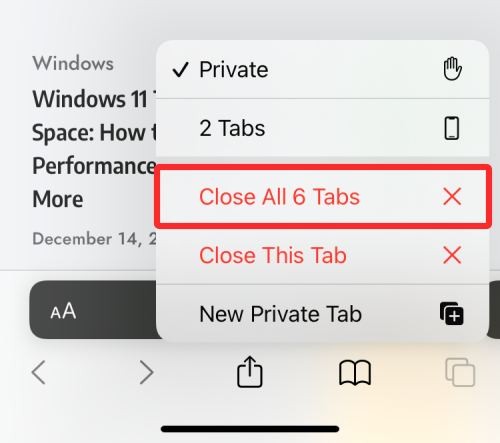
- Now, press and hold the tab icon in the lower right corner.
- In the overflow menu that appears, select Close all "x" tabs.
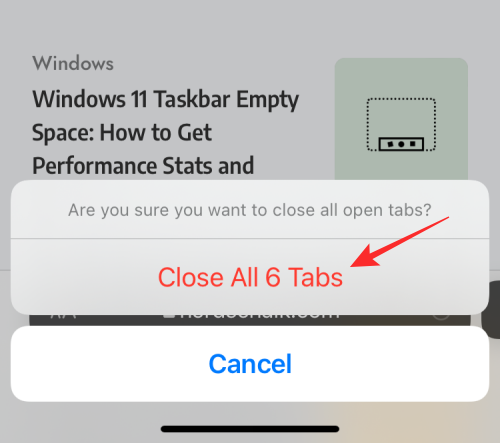
- Now you will see a prompt on the screen asking if you want to continue with the selected action. Here, click to close all “x” tabs.
- Any tabs you have privately open in Safari will be removed and you will only see the Start page on your screen.
- You may still have to disable Private Browsing Mode yourself from here, but you can rest assured that your open private tabs won't show up again.

How to Enable Face ID to Unlock Private Browsing on Safari
As we explained above, closing the Safari app with Private Browsing enabled will not cause your next Disable it when opening it. To prevent yourself from embarrassing yourself and prevent others from accessing your active tabs on Private Browsing, iOS lets you lock Private Browsing mode using Face ID on iOS 17 or later. With this extra level of privacy, no one but you will be able to open or view tabs open in Safari’s private browsing mode.
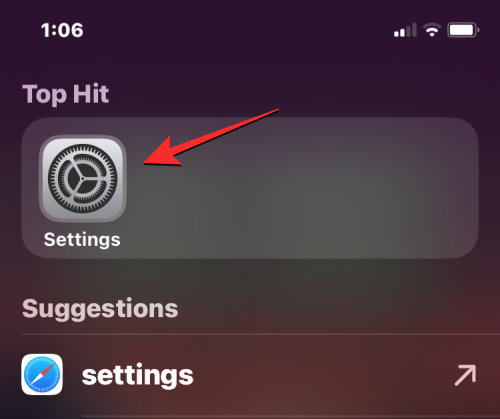
- To enable Face ID to unlock private browsing, open the Settings app on your iPhone.
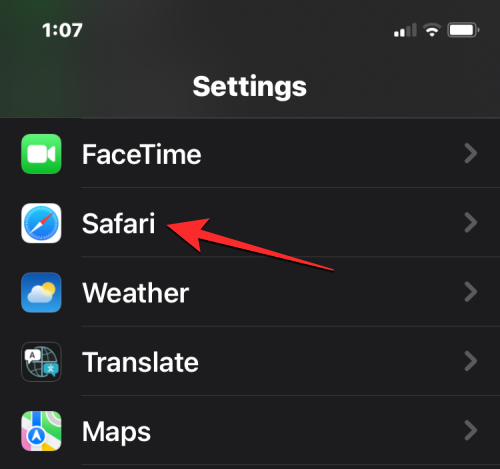
- In Settings, scroll down and tap Safari.
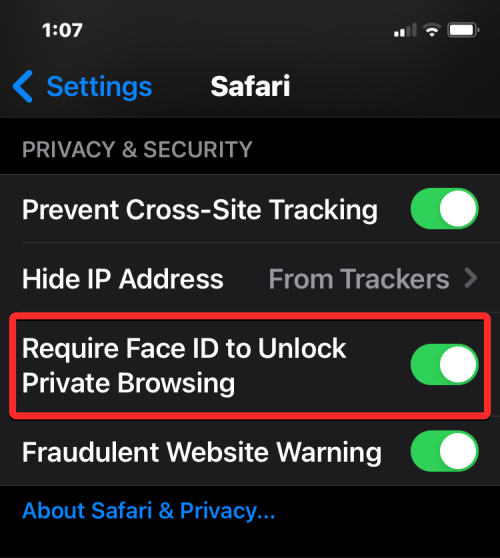
- On the Safari screen, find the "Privacy & Security" section and turn on the "Require Face ID to Unlock Private Browsing" switch.
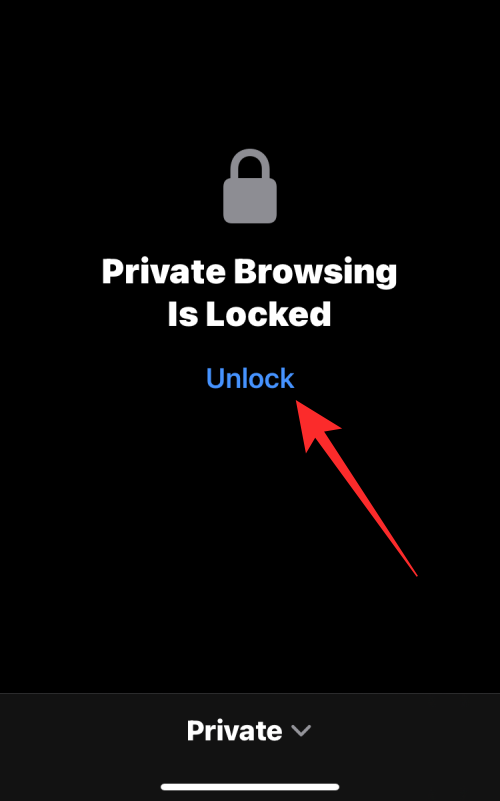
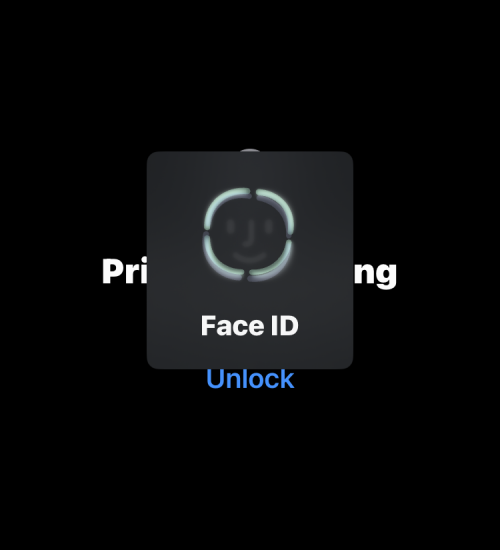
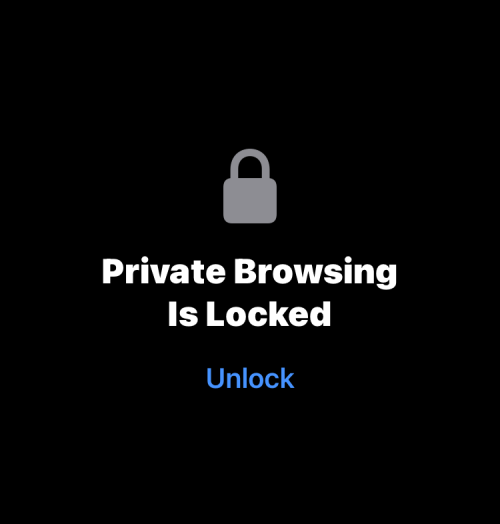
- When you do this, your private browsing session will be locked when you close the Safari app. When you open Safari again, you can exit Private Browsing or access your Private Browsing by clicking Unlock.
- Before entering Private Browsing, you will be asked to verify your identity using Face ID or your device passcode so others cannot gain access without your knowledge it.
What happens when you close Safari with the Privacy tab open?
Unlike other browser apps like Chrome or Brave, Safari doesn't completely close your Private tabs when you terminate the app on iOS. This means that when you close a Safari app by swiping from the Recent Apps screen, the Private tabs that were open before you closed the app will reappear when you launch Safari again on your iPhone.
While you'll be asked to "unlock" Private Browsing using Face ID or your device passcode, there's a chance you might accidentally unlock this mode when you unlock your iPhone. This can lead to an awkward situation where you might have forgotten to exit private mode during your last browsing session, because reopening Safari will load all the web pages you might have open as private tabs again.
In contrast, when you close Chrome or the Brave app during private browsing, all private tabs are closed permanently and there is no way to restore them. This way, your private browsing sessions will remain private and anonymous, even if you fail to close tabs that may have been open.
Sadly, Safari on iOS has no such feature. Therefore, the only real way to avoid any future humiliation is to manually disable private browsing every time you browse anonymously on Safari.
The above is the detailed content of How to disable private browsing mode in Safari on iPhone. For more information, please follow other related articles on the PHP Chinese website!

Hot AI Tools

Undress AI Tool
Undress images for free

Undresser.AI Undress
AI-powered app for creating realistic nude photos

AI Clothes Remover
Online AI tool for removing clothes from photos.

Clothoff.io
AI clothes remover

Video Face Swap
Swap faces in any video effortlessly with our completely free AI face swap tool!

Hot Article
Hot Tools

Notepad++7.3.1
Easy-to-use and free code editor

SublimeText3 Chinese version
Chinese version, very easy to use

Zend Studio 13.0.1
Powerful PHP integrated development environment

Dreamweaver CS6
Visual web development tools

SublimeText3 Mac version
God-level code editing software (SublimeText3)
Hot Topics


 How to solve the problem of 'Undefined array key 'sign'' error when calling Alipay EasySDK using PHP?
Mar 31, 2025 pm 11:51 PM
How to solve the problem of 'Undefined array key 'sign'' error when calling Alipay EasySDK using PHP?
Mar 31, 2025 pm 11:51 PM
Problem Description When calling Alipay EasySDK using PHP, after filling in the parameters according to the official code, an error message was reported during operation: "Undefined...
 Multi-party certification: iPhone 17 standard version will support high refresh rate! For the first time in history!
Apr 13, 2025 pm 11:15 PM
Multi-party certification: iPhone 17 standard version will support high refresh rate! For the first time in history!
Apr 13, 2025 pm 11:15 PM
Apple's iPhone 17 may usher in a major upgrade to cope with the impact of strong competitors such as Huawei and Xiaomi in China. According to the digital blogger @Digital Chat Station, the standard version of iPhone 17 is expected to be equipped with a high refresh rate screen for the first time, significantly improving the user experience. This move marks the fact that Apple has finally delegated high refresh rate technology to the standard version after five years. At present, the iPhone 16 is the only flagship phone with a 60Hz screen in the 6,000 yuan price range, and it seems a bit behind. Although the standard version of the iPhone 17 will have a high refresh rate screen, there are still differences compared to the Pro version, such as the bezel design still does not achieve the ultra-narrow bezel effect of the Pro version. What is more worth noting is that the iPhone 17 Pro series will adopt a brand new and more
 Gate.io trading platform official app download and installation address
Feb 13, 2025 pm 07:33 PM
Gate.io trading platform official app download and installation address
Feb 13, 2025 pm 07:33 PM
This article details the steps to register and download the latest app on the official website of Gate.io. First, the registration process is introduced, including filling in the registration information, verifying the email/mobile phone number, and completing the registration. Secondly, it explains how to download the Gate.io App on iOS devices and Android devices. Finally, security tips are emphasized, such as verifying the authenticity of the official website, enabling two-step verification, and being alert to phishing risks to ensure the safety of user accounts and assets.
 Anbi app official download v2.96.2 latest version installation Anbi official Android version
Mar 04, 2025 pm 01:06 PM
Anbi app official download v2.96.2 latest version installation Anbi official Android version
Mar 04, 2025 pm 01:06 PM
Binance App official installation steps: Android needs to visit the official website to find the download link, choose the Android version to download and install; iOS search for "Binance" on the App Store. All should pay attention to the agreement through official channels.
 How to open XML files with iPhone
Apr 02, 2025 pm 11:00 PM
How to open XML files with iPhone
Apr 02, 2025 pm 11:00 PM
There is no built-in XML viewer on iPhone, and you can use third-party applications to open XML files, such as XML Viewer, JSON Viewer. Method: 1. Download and install the XML viewer in the App Store; 2. Find the XML file on the iPhone; 3. Press and hold the XML file to select "Share"; 4. Select the installed XML viewer app; 5. The XML file will open in the app. Note: 1. Make sure the XML viewer is compatible with the iPhone iOS version; 2. Be careful about case sensitivity when entering file paths; 3. Be careful with XML documents containing external entities
 How to view XML on your phone without a network
Apr 02, 2025 pm 10:30 PM
How to view XML on your phone without a network
Apr 02, 2025 pm 10:30 PM
There are two ways to view XML files: Android phones: use file manager or third-party applications (XML Viewer, DroidEdit). iPhone: Transfer files via iCloud Drive and use the Files app or third-party app (XML Buddha, Textastic).
 Can mysql return json
Apr 08, 2025 pm 03:09 PM
Can mysql return json
Apr 08, 2025 pm 03:09 PM
MySQL can return JSON data. The JSON_EXTRACT function extracts field values. For complex queries, you can consider using the WHERE clause to filter JSON data, but pay attention to its performance impact. MySQL's support for JSON is constantly increasing, and it is recommended to pay attention to the latest version and features.
 Download link of Ouyi iOS version installation package
Feb 21, 2025 pm 07:42 PM
Download link of Ouyi iOS version installation package
Feb 21, 2025 pm 07:42 PM
Ouyi is a world-leading cryptocurrency exchange with its official iOS app that provides users with a convenient and secure digital asset management experience. Users can download the Ouyi iOS version installation package for free through the download link provided in this article, and enjoy the following main functions: Convenient trading platform: Users can easily buy and sell hundreds of cryptocurrencies on the Ouyi iOS app, including Bitcoin and Ethereum. and Dogecoin. Safe and reliable storage: Ouyi adopts advanced security technology to provide users with safe and reliable digital asset storage. 2FA, biometric authentication and other security measures ensure that user assets are not infringed. Real-time market data: Ouyi iOS app provides real-time market data and charts, allowing users to grasp encryption at any time
