
 System Tutorial
Windows Series
How to resolve 'Windows cannot verify the digital signature for the drivers required (Code 52)'?
System Tutorial
Windows Series
How to resolve 'Windows cannot verify the digital signature for the drivers required (Code 52)'?
How to resolve 'Windows cannot verify the digital signature for the drivers required (Code 52)'?
Jul 14, 2025 am 01:53 AM
If you encounter the problem of "Windows cannot verify the digital signature of the driver required by this device (Error code 52)", you can solve it through the following steps: 1. Update or reinstall the driver, update, uninstall and restart or manually install the latest version of the official website through Device Manager; 2. Disable forced signature verification, run the command prompt as an administrator and enter "bcdedit /set testsigning on", which takes effect after restart, but only for use in the test environment; 3. Turn off Secure Boot, set this option to Disabled in BIOS settings, the specific keys vary according to the motherboard brand; 4. Check system integrity, execute the "sfc /scannow" and "DISM /Online /Cleanup-Image /RestoreHealth" commands to repair system files. Try the above methods one by one, and be careful to avoid making mistakes in other settings when operating to ensure that each step is accurate.

The problem of "Windows cannot verify the digital signature of the driver required by this device (Error Code 52)" is usually because the system finds that there is a problem with its digital signature when loading a driver. Although it seems scary, it can actually be solved through some common means in most cases.
Update or reinstall the driver
This is the most common solution. This error is often caused by the driver file being corrupted, incomplete, or signature failure. You can try:
- Open Device Manager and find the device that reported the error.
- Right-click to select the device and click Update Driver .
- If it doesn't work, you can try uninstalling the device , then restarting the computer, and letting the system reinstall automatically.
- Or go to the official website to download the latest version of the driver and install it manually.
Sometimes the old driver and the new version of Windows are incompatible, and the problem can be solved after the update.
Disable forced signature verification (for temporary testing)
If you are sure that this driver is trustworthy but has not passed Microsoft's signature authentication, you can consider temporarily disabling signature verification:
- Press
Win Xand select Command Prompt (Administrator) or Terminal (Administrator). - Enter the following command and press Enter:
bcdedit /set testsigning on
- After restarting the computer, you will see a watermark of "Test Mode" in the lower right corner of the desktop.
?? Note: This method will allow the system to load unsigned drivers, but may also bring security risks. It is recommended to be used only in the test environment.
Turn off Secure Boot (UEFI secure boot)
Secure Boot is a UEFI feature that prevents unsigned drivers from running. Some old or third-party drivers may be blocked as a result.
The operation steps are roughly as follows:
- Enter BIOS settings (press F2, Del or other specified keys when restarting).
- Find the Secure Boot settings item.
- Set it to Disabled .
- Save and exit.
This step of operation varies slightly depending on the motherboard brand. For details, you can check the motherboard manual or search for the settings corresponding to the model.
Check if system integrity is damaged
If none of the above methods are useful, it may be that there is a problem with the system file. You can check it with the system's own repair tool:
- Open a command prompt as an administrator.
- Enter the following commands to execute:
-
sfc /scannow -
DISM /Online /Cleanup-Image /RestoreHealth
-
These two commands can help you scan and repair system files. Restart after completion to see if the problem has improved.
Basically these common ways of dealing with it. It's not particularly complicated, but every step is very critical, especially when turning off Secure Boot and disabling signature verification, be careful not to correct other settings. When encountering uncertain situations, it is best to check it out first before taking action.
The above is the detailed content of How to resolve 'Windows cannot verify the digital signature for the drivers required (Code 52)'?. For more information, please follow other related articles on the PHP Chinese website!

Hot AI Tools

Undress AI Tool
Undress images for free

Undresser.AI Undress
AI-powered app for creating realistic nude photos

AI Clothes Remover
Online AI tool for removing clothes from photos.

Clothoff.io
AI clothes remover

Video Face Swap
Swap faces in any video effortlessly with our completely free AI face swap tool!

Hot Article
Hot Tools

Notepad++7.3.1
Easy-to-use and free code editor

SublimeText3 Chinese version
Chinese version, very easy to use

Zend Studio 13.0.1
Powerful PHP integrated development environment

Dreamweaver CS6
Visual web development tools

SublimeText3 Mac version
God-level code editing software (SublimeText3)


 Detailed introduction to the difference between NVIDIA graphics card driver Game ready and Studio
Mar 14, 2024 am 10:00 AM
Detailed introduction to the difference between NVIDIA graphics card driver Game ready and Studio
Mar 14, 2024 am 10:00 AM
NVIDIA is a graphics card brand used by many users, that is, N card. However, some users found that there are Gameready and Studio when downloading the graphics card driver. Is there any difference? Let’s take a look at the detailed introduction of the difference between NVIDIA graphics card driver Gameready and Studio. Gameready is a product of NVIDIA graphics cards optimized for the gaming field, while the Studio series is aimed at professional users and optimizes the experience of using productivity software. These two series of graphics cards provide the best performance and stability for different application fields to meet users' needs for games and professional software. 2. The frequency of updates is different: gameready is updated frequently and will be released
 How to fix error DXGI_ERROR_DEVICE_HUNG in Windows 10 and 11
Oct 26, 2023 pm 11:13 PM
How to fix error DXGI_ERROR_DEVICE_HUNG in Windows 10 and 11
Oct 26, 2023 pm 11:13 PM
This video cannot be played due to a technical error. (Error Code: 102006) We'll go through simple steps to fix this error and share tips to prevent it from happening again. Our goal is to help you resolve this issue quickly and get back to a smoothly running computer. What is 0x887A0006DXGI_ERROR_DEVICE_HUNG? DXGI (DirectXGraphicsInfrastructure) is a part of Windows that helps with graphics content such as games and videos. When there is a problem with the graphics driver on Windows 10 and 11, the dxgi_error_device_hung error usually pops up, especially when
 How to fix device disabled (error code 22) in Windows 10/11
Aug 04, 2023 pm 03:17 PM
How to fix device disabled (error code 22) in Windows 10/11
Aug 04, 2023 pm 03:17 PM
Is the "This device is disabled" code 22 error in Device Manager preventing you from using a new or old device on your PC? Don’t worry because we are here to help you solve this problem. A code 22 error means the device has been manually disabled and sometimes re-enabling it does not help. Whatever the cause, here are 10 ways to fix the “This device is disabled” code 10 error on Windows 22/PC and make that hardware work again. 1. Unplug and replug new hardware New hardware you plug into your PC may start working again after a quick removal and reinstallation. So if it's a device plugged in via USB, go ahead and unplug it. Then, wait a few seconds and plug it back in. Now, check if the device is showing up in device manager
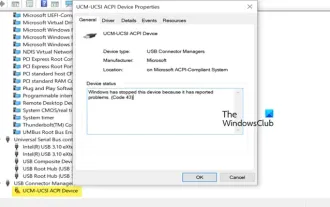 UCM in Windows 11/10 - UCSI VPI device driver error
Mar 24, 2024 am 09:50 AM
UCM in Windows 11/10 - UCSI VPI device driver error
Mar 24, 2024 am 09:50 AM
UCM-UCSIVPI is crucial to your computer because it is responsible for managing the USB Type-C port. When you encounter error messages for this driver in Device Manager, it will affect the normal working of your USB Type-C port. Therefore, it is crucial to resolve this issue promptly and this article will guide you on how to resolve the issues caused by this error message. UCM-UCSIACPI, Windows has stopped this device because it reported a problem (code 43). What is UCM—UCSIVPI device driver? Microsoft provides a driver that complies with the USB Type-C Connector System Software Interface (UCSI) specification for TPI transmission. If your system is configured
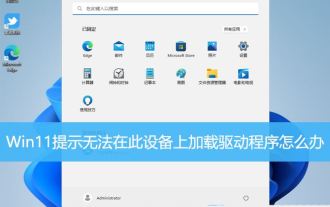 What should I do if Win11 fails to load the driver? What to do if the driver cannot be loaded on this device?
Apr 11, 2024 pm 05:01 PM
What should I do if Win11 fails to load the driver? What to do if the driver cannot be loaded on this device?
Apr 11, 2024 pm 05:01 PM
This article aims to solve the "The driver cannot be loaded on this device" error message that Win11 users encounter when trying to install or update drivers. By reading this article, Win11 users will be able to solve the "The driver cannot be loaded on this device" problem, thereby ensuring the stability of the system and the normal operation of the hardware device. Program Compatibility Assistant prompts: The driver cannot be loaded on this device. Method 1: 1. Press the [Win+X] key combination, or [right-click] click [Windows Start Logo] on the taskbar, and open the hidden menu item , select [Terminal Administrator]; 2. User Account Control window, do you want to allow this application to make changes to your device? Click【
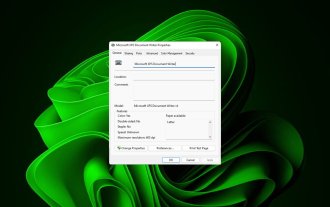 4 Ways to Quickly Rename a Printer on Windows 11
Sep 11, 2023 pm 03:26 PM
4 Ways to Quickly Rename a Printer on Windows 11
Sep 11, 2023 pm 03:26 PM
If you have a lot of printers in your office, the printer list can be long and make getting work done tedious. What's more, multiple printers usually mean similar names, which can be a bit confusing. The last thing you want is to scroll through an endless list and still end up sending your print job to the wrong printer. Fortunately, you can solve all of these problems with a simple renaming trick, which we'll show you below. How do I rename my printer in Windows 11? 1. Using the Settings app tap the key and click Settings. Windows click Bluetooth and Devices and select Printers and Scanners. Select the printer you want to rename. Click Printer Properties. Navigate to the General tab, key
![What should I do if my Bluetooth peripheral device does not have a driver? [solved]](https://img.php.cn/upload/article/000/465/014/171033721377290.jpg?x-oss-process=image/resize,m_fill,h_207,w_330) What should I do if my Bluetooth peripheral device does not have a driver? [solved]
Mar 13, 2024 pm 09:40 PM
What should I do if my Bluetooth peripheral device does not have a driver? [solved]
Mar 13, 2024 pm 09:40 PM
When many users use the Bluetooth function, an error message box pops up: The driver for the bluetooth peripheral device cannot be found, and an exclamation mark is displayed when opening the device manager. What is going on? In response to this problem, today I will share with you how to deal with the problem that the driver for the bluetooth peripheral device cannot be found. How to solve the problem that the driver cannot be found for bluetooth peripheral devices? Right-click the Bluetooth icon in the lower right corner to display Bluetooth devices. Right-click the paired Bluetooth device and click Delete Device, and the Bluetooth peripheral device will disappear. There is an uninstalled "Bluetooth Peripheral Device" in "Device Manager"
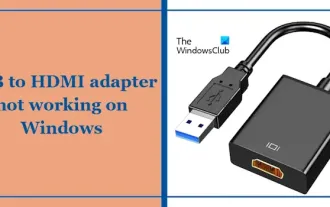 USB to HDMI adapter not working properly on Windows 11/10
Feb 19, 2024 pm 12:00 PM
USB to HDMI adapter not working properly on Windows 11/10
Feb 19, 2024 pm 12:00 PM
If you're having issues with your USB to HDMI adapter not working properly on Windows, it could be because of an outdated graphics card driver or a problem with the adapter itself. The following content will help you resolve this dilemma. Fix USB to HDMI adapter not working on Windows 11/10 Use the following solutions to fix USB to HDMI adapter not working on Windows 10/11: Update Display Adapter Driver Rollback Graphics Driver Unplug and Plug USB to HDMI Adapter Updated BIOS Let's get started. 1] Update Display Adapter Driver Issues may be caused by outdated or corrupted display adapter drivers. You can try downloading from the official website of the manufacturer
