


Use the following steps to search globally in VSCode: Open VSCode, press the shortcut key, and enter the search box. Enter the search content and select the search range (full workspace or specific directory). (Optional) Configure search options such as regular expressions, case distinction, etc. Click the Find button and the search results will be displayed in the Search tab, containing the file name, line number, and matching text.

How to use VSCode for global code search
VSCode provides powerful global search capabilities to quickly find code throughout the workspace or in a specific directory.
How to do a global code search:
- Open VSCode and press
CtrlShiftF(for Windows) orCmdShiftF(for macOS). - Enter the text or regular expression you want to find in the search box.
- Click the File Include drop-down menu and select Entire Workspace or Included Folders.
-
Select other options (optional):
- Use Regular Expressions: Enable this option to search with regular expressions.
- Case sensitivity: Enable this option to be case sensitive.
- Match all: Enable this option to display only results that match the search terms exactly.
- Click the Find button to start the search.
Search results:
- The search results will be displayed in the Search tab.
-
Each result contains the following information:
- File name
- Match line numbers
- Match text summary
- Click the result to go to where the match is in the file.
Advanced search tips:
- Use Glob pattern: Use Glob patterns such as
*and?in search terms to match files and folders. - Use regular expressions: Use regular expression syntax such as
^,$, and[]for advanced searches. - Search for file type: Select a specific file type (for example,
.jsor.html) in the File Include drop-down menu to filter. - Replace matches: Right-click the search result and select Replace to replace the matching text.
The above is the detailed content of How to search code globally for vscode. For more information, please follow other related articles on the PHP Chinese website!

Hot AI Tools

Undress AI Tool
Undress images for free

Undresser.AI Undress
AI-powered app for creating realistic nude photos

AI Clothes Remover
Online AI tool for removing clothes from photos.

Clothoff.io
AI clothes remover

Video Face Swap
Swap faces in any video effortlessly with our completely free AI face swap tool!

Hot Article
Hot Tools

Notepad++7.3.1
Easy-to-use and free code editor

SublimeText3 Chinese version
Chinese version, very easy to use

Zend Studio 13.0.1
Powerful PHP integrated development environment

Dreamweaver CS6
Visual web development tools

SublimeText3 Mac version
God-level code editing software (SublimeText3)
Hot Topics


 Where is the pycharm interpreter?
May 23, 2025 pm 10:09 PM
Where is the pycharm interpreter?
May 23, 2025 pm 10:09 PM
Setting the location of the interpreter in PyCharm can be achieved through the following steps: 1. Open PyCharm, click the "File" menu, and select "Settings" or "Preferences". 2. Find and click "Project:[Your Project Name]" and select "PythonInterpreter". 3. Click "AddInterpreter", select "SystemInterpreter", browse to the Python installation directory, select the Python executable file, and click "OK". When setting up the interpreter, you need to pay attention to path correctness, version compatibility and the use of the virtual environment to ensure the smooth operation of the project.
 Configure VSCode and GitHub for code synchronization
May 20, 2025 pm 06:33 PM
Configure VSCode and GitHub for code synchronization
May 20, 2025 pm 06:33 PM
Configuring VSCode to synchronize code with GitHub can improve development efficiency and team collaboration. First, install the "GitHubPullRequestsandIssues" and "GitLens" plugins; second, configure the GitHub account; then clone or create a repository; finally, submit and push the code to GitHub.
 The difference between programming in Java and other languages ??Analysis of the advantages of cross-platform features of Java
May 20, 2025 pm 08:21 PM
The difference between programming in Java and other languages ??Analysis of the advantages of cross-platform features of Java
May 20, 2025 pm 08:21 PM
The main difference between Java and other programming languages ??is its cross-platform feature of "writing at once, running everywhere". 1. The syntax of Java is close to C, but it removes pointer operations that are prone to errors, making it suitable for large enterprise applications. 2. Compared with Python, Java has more advantages in performance and large-scale data processing. The cross-platform advantage of Java stems from the Java virtual machine (JVM), which can run the same bytecode on different platforms, simplifying development and deployment, but be careful to avoid using platform-specific APIs to maintain cross-platformity.
 Commands and configurations for starting Apache service in macOS system
May 16, 2025 pm 10:00 PM
Commands and configurations for starting Apache service in macOS system
May 16, 2025 pm 10:00 PM
The command to start the Apache service on macOS is sudoapachectlstart, and the configuration file is located in /etc/apache2/. The main steps include: 1. Edit the httpd.conf file, modify the Listen port such as Listen8080; 2. Adjust the DocumentRoot path to the personal directory such as /Users/your_username/Sites, and update the corresponding permission settings; 3. Use the sudoapachectlgraceful command to restart Apache to ensure that the configuration takes effect; 4. Enable the mod_deflate module to compress data to improve page loading speed.
 MySQL installation tutorial teach you step by step the detailed steps for installing and configuration of mySQL step by step
May 23, 2025 am 06:09 AM
MySQL installation tutorial teach you step by step the detailed steps for installing and configuration of mySQL step by step
May 23, 2025 am 06:09 AM
The installation and configuration of MySQL can be completed through the following steps: 1. Download the installation package suitable for the operating system from the official website. 2. Run the installer, select the "Developer Default" option and set the root user password. 3. After installation, configure environment variables to ensure that the bin directory of MySQL is in PATH. 4. When creating a user, follow the principle of minimum permissions and set a strong password. 5. Adjust the innodb_buffer_pool_size and max_connections parameters when optimizing performance. 6. Back up the database regularly and optimize query statements to improve performance.
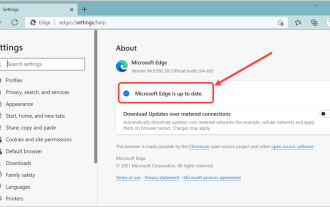 How to stop Microsoft Edge automatic updates
May 21, 2025 am 10:12 AM
How to stop Microsoft Edge automatic updates
May 21, 2025 am 10:12 AM
How to stop Microsoft Edge Automatically Update Microsoft Edge is the default browser that comes with Windows 11. Earlier, the Edge browser received updates as the Windows operating system was updated. However, the Edge browser based on Chromium has changed that. The browser will now automatically update in the background without your knowledge. In this article, we will explain how to stop automatic Microsoft Edge updates in Windows 11 and macOS. Related: How to disable automatic updates in Google Chrome? Check for automatic edge updates Chromium-based Edge vs. Goo based on Chromium backend code
 Solve the coding settings and garbled problems of VSCode when dealing with multilingual projects
May 22, 2025 pm 10:57 PM
Solve the coding settings and garbled problems of VSCode when dealing with multilingual projects
May 22, 2025 pm 10:57 PM
VSCode solves the problems of multilingual project coding and garbled code including: 1. Ensure that the file is saved with correct encoding and use the "redetection encoding" function; 2. Set the file encoding to UTF-8 and automatically detect the encoding; 3. Control whether to add BOM; 4. Use the "EncodingConverter" plug-in to convert encoding; 5. Use the multiple workspace functions to set encoding for different sub-projects; 6. Optimize performance and ignore unnecessary file monitoring. Through these steps, the coding problem of multilingual projects can be effectively dealt with.
 Experience in participating in VSCode offline technology exchange activities
May 29, 2025 pm 10:00 PM
Experience in participating in VSCode offline technology exchange activities
May 29, 2025 pm 10:00 PM
I have a lot of experience in participating in VSCode offline technology exchange activities, and my main gains include sharing of plug-in development, practical demonstrations and communication with other developers. 1. Sharing of plug-in development: I learned how to use VSCode's plug-in API to improve development efficiency, such as automatic formatting and static analysis plug-ins. 2. Practical demonstration: I learned how to use VSCode for remote development and realized its flexibility and scalability. 3. Communicate with developers: I have obtained skills to optimize VSCode startup speed, such as reducing the number of plug-ins loaded at startup and managing the plug-in loading order. In short, this event has benefited me a lot and I highly recommend those who are interested in VSCode to participate.
