
 System Tutorial
Windows Series
A Professional Guide to Installing Windows 11: Tips and Best Practices for a Clean Install
System Tutorial
Windows Series
A Professional Guide to Installing Windows 11: Tips and Best Practices for a Clean Install
A Professional Guide to Installing Windows 11: Tips and Best Practices for a Clean Install
Mar 12, 2025 am 11:43 AM
A Professional Guide to Installing Windows 11: Tips and Best Practices for a Clean Install
This guide provides a comprehensive walkthrough for a clean installation of Windows 11, minimizing potential problems and maximizing performance. A clean install, unlike an upgrade, completely wipes your hard drive, removing all existing files and applications before installing a fresh copy of the operating system. This is beneficial for resolving persistent issues, improving performance, and creating a more stable system. However, it requires careful preparation and execution. We'll cover the essential steps, optimization techniques, and data backup strategies to ensure a smooth and successful installation.
Essential Steps for a Clean Windows 11 Installation to Avoid Common Pitfalls
Before embarking on a clean install, meticulous preparation is crucial. Here's a step-by-step guide to avoid common pitfalls:
- Back up your data: This is paramount. A clean install erases everything on your target drive. Back up all important files, documents, photos, and videos to an external hard drive, cloud storage (like OneDrive, Google Drive, or Dropbox), or a USB drive. Ensure you have a reliable backup method and test the restoration process before proceeding.
- Gather your Windows 11 installation media: You'll need a bootable USB drive or DVD containing the Windows 11 installation files. Microsoft provides a Media Creation Tool to easily create this. Download the tool from the official Microsoft website and follow the instructions. Choose the correct edition (Home or Pro) and language.
- Check your system requirements: Ensure your hardware meets the minimum requirements for Windows 11. This includes processor, RAM, storage space, and TPM (Trusted Platform Module) 2.0. You can find the official requirements on Microsoft's website.
- Boot from the installation media: Restart your computer and enter the BIOS/UEFI settings (usually by pressing Delete, F2, F10, or F12 during startup – the key varies depending on your motherboard). Configure the boot order to prioritize your USB drive or DVD. Save the changes and exit.
- Choose your language and region: Follow the on-screen instructions to select your language and region.
- Accept the license terms: Carefully read and accept the Windows 11 license terms.
- Choose "Custom: Install Windows only (advanced)": This option allows for a clean installation, wiping the selected drive. Warning: This action is irreversible, so double-check you've backed up your data.
- Select the drive to install Windows: Choose the drive where you want to install Windows 11. Make absolutely sure you select the correct drive. Deleting the wrong drive will result in permanent data loss.
- Wait for the installation to complete: The installation process will take some time. Your computer will restart several times.
- Personalize your Windows 11 installation: After the installation is complete, you'll be prompted to create a user account, connect to the internet, and personalize your settings.
Optimizing System Performance After a Clean Windows 11 Installation
A clean install provides a great foundation for optimal performance, but further optimization is recommended:
- Install essential drivers: Update your drivers for your graphics card, network adapter, and other hardware components. These can usually be downloaded from the manufacturer's website.
- Install necessary software: Install only the applications you need. Avoid unnecessary bloatware.
- Disable startup programs: Many applications automatically start when Windows boots, slowing down the process. Use the Task Manager (Ctrl Shift Esc) to disable unnecessary startup programs.
- Defragment your hard drive (if using an HDD): If you're using a traditional hard disk drive (HDD), defragmenting can improve performance. SSDs don't require defragmentation.
- Run Disk Cleanup: This built-in Windows tool removes temporary files and other unnecessary data, freeing up disk space and improving performance.
- Update Windows: Ensure your Windows installation is up-to-date by installing the latest updates and security patches.
- Consider using an SSD: If you're still using a traditional HDD, upgrading to a Solid State Drive (SSD) will dramatically improve boot times and overall system responsiveness.
Best Practices for Backing Up Your Data Before and After a Clean Windows 11 Install
Data backup is critical before and after a clean installation. Here's a robust strategy:
Before the Clean Install:
- Full System Image Backup: Create a complete image backup of your entire system drive using built-in Windows tools (like File History or third-party software like Acronis True Image or Macrium Reflect). This allows for a complete system restoration in case of problems.
- File-Level Backup: Back up all your important files and folders to an external hard drive, cloud storage, or another location. This is crucial even if you create a system image backup, as it provides a separate copy of your personal data.
- Test Your Backup: After creating your backups, test the restoration process to ensure everything works correctly. This verifies your backup's integrity and allows you to troubleshoot any issues before you proceed with the clean install.
After the Clean Install:
- Verify System Functionality: After installing Windows 11, verify that all your hardware and software are working correctly.
- Restore Your Data: Restore your files and folders from your backup. If you created a system image backup, consider restoring it only if you encounter major problems. Restoring a system image will overwrite any changes you've made after the clean install.
- Update Your Backups: Once you've restored your data and verified everything is working correctly, update your backups to include the new clean installation and any new data you've added. This ensures you have the most current backup.
By following these guidelines, you can perform a clean installation of Windows 11 smoothly and efficiently, maximizing your system's performance and protecting your valuable data. Remember that thorough planning and preparation are key to a successful clean install.
The above is the detailed content of A Professional Guide to Installing Windows 11: Tips and Best Practices for a Clean Install. For more information, please follow other related articles on the PHP Chinese website!

Hot AI Tools

Undress AI Tool
Undress images for free

Undresser.AI Undress
AI-powered app for creating realistic nude photos

AI Clothes Remover
Online AI tool for removing clothes from photos.

Clothoff.io
AI clothes remover

Video Face Swap
Swap faces in any video effortlessly with our completely free AI face swap tool!

Hot Article
Hot Tools

Notepad++7.3.1
Easy-to-use and free code editor

SublimeText3 Chinese version
Chinese version, very easy to use

Zend Studio 13.0.1
Powerful PHP integrated development environment

Dreamweaver CS6
Visual web development tools

SublimeText3 Mac version
God-level code editing software (SublimeText3)


 Fixed Windows 11 Google Chrome not opening
Jul 08, 2025 pm 02:36 PM
Fixed Windows 11 Google Chrome not opening
Jul 08, 2025 pm 02:36 PM
Fixed Windows 11 Google Chrome not opening Google Chrome is the most popular browser right now, but even it sometimes requires help to open on Windows. Then follow the on-screen instructions to complete the process. After completing the above steps, launch Google Chrome again to see if it works properly now. 5. Delete Chrome User Profile If you are still having problems, it may be time to delete Chrome User Profile. This will delete all your personal information, so be sure to back up all relevant data. Typically, you delete the Chrome user profile through the browser itself. But given that you can't open it, here's another way: Turn on Windo
 How to fix second monitor not detected in Windows?
Jul 12, 2025 am 02:27 AM
How to fix second monitor not detected in Windows?
Jul 12, 2025 am 02:27 AM
When Windows cannot detect a second monitor, first check whether the physical connection is normal, including power supply, cable plug-in and interface compatibility, and try to replace the cable or adapter; secondly, update or reinstall the graphics card driver through the Device Manager, and roll back the driver version if necessary; then manually click "Detection" in the display settings to identify the monitor to confirm whether it is correctly identified by the system; finally check whether the monitor input source is switched to the corresponding interface, and confirm whether the graphics card output port connected to the cable is correct. Following the above steps to check in turn, most dual-screen recognition problems can usually be solved.
 Want to Build an Everyday Work Desktop? Get a Mini PC Instead
Jul 08, 2025 am 06:03 AM
Want to Build an Everyday Work Desktop? Get a Mini PC Instead
Jul 08, 2025 am 06:03 AM
Mini PCs have undergone
 Fixed the failure to upload files in Windows Google Chrome
Jul 08, 2025 pm 02:33 PM
Fixed the failure to upload files in Windows Google Chrome
Jul 08, 2025 pm 02:33 PM
Have problems uploading files in Google Chrome? This may be annoying, right? Whether you are attaching documents to emails, sharing images on social media, or submitting important files for work or school, a smooth file upload process is crucial. So, it can be frustrating if your file uploads continue to fail in Chrome on Windows PC. If you're not ready to give up your favorite browser, here are some tips for fixes that can't upload files on Windows Google Chrome 1. Start with Universal Repair Before we learn about any advanced troubleshooting tips, it's best to try some of the basic solutions mentioned below. Troubleshooting Internet connection issues: Internet connection
 How to clear the print queue in Windows?
Jul 11, 2025 am 02:19 AM
How to clear the print queue in Windows?
Jul 11, 2025 am 02:19 AM
When encountering the problem of printing task stuck, clearing the print queue and restarting the PrintSpooler service is an effective solution. First, open the "Device and Printer" interface to find the corresponding printer, right-click the task and select "Cancel" to clear a single task, or click "Cancel all documents" to clear the queue at one time; if the queue is inaccessible, press Win R to enter services.msc to open the service list, find "PrintSpooler" and stop it before starting the service. If necessary, you can manually delete the residual files under the C:\Windows\System32\spool\PRINTERS path to completely solve the problem.
 How to show file extensions in Windows 11 File Explorer?
Jul 08, 2025 am 02:40 AM
How to show file extensions in Windows 11 File Explorer?
Jul 08, 2025 am 02:40 AM
To display file extensions in Windows 11 File Explorer, you can follow the following steps: 1. Open any folder; 2. Click the "View" tab in the top menu bar; 3. Click the "Options" button in the upper right corner; 4. Switch to the "View" tab; 5. Uncheck "Hide extensions for known file types"; 6. Click "OK" to save settings. This setting helps identify file types, improve development efficiency, and troubleshoot problems. If you just want to view the extension temporarily, you can right-click the file and select "Rename" and press the Esc key to exit, and the system settings will not be changed.
 How to fix 'You need permission to perform this action' in Windows?
Jul 09, 2025 am 02:49 AM
How to fix 'You need permission to perform this action' in Windows?
Jul 09, 2025 am 02:49 AM
When encountering the problem of "You need permission to perform this operation", it is usually because the Windows permission management mechanism restricts the operation. The solutions include: 1. Run the program as an administrator, right-click to select "Run as an administrator" and confirm the UAC prompt; 2. Obtain file/folder ownership, change the owner to the current user in "Properties → Security → Advanced" and replace the subcontainer; 3. Adjust the permission settings, and give yourself "full control" permissions through "Properties → Security → Edit"; 4. Check whether the file is occupied, close the relevant programs or use Unlocker and LockHunter to unoccupi. Try it one by one to solve the problem.
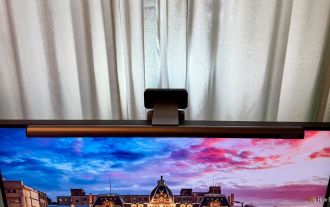 BenQ ScreenBar Halo 2 Review: Front and Rear Monitor Light with Wireless Control
Jul 15, 2025 am 09:03 AM
BenQ ScreenBar Halo 2 Review: Front and Rear Monitor Light with Wireless Control
Jul 15, 2025 am 09:03 AM
