


Tired of the same old ringtones and notifications? Personalize your Android or iOS device with custom audio alerts! This guide shows you how to create and set unique sounds for calls, messages, and app notifications.
Creating Your Custom Audio
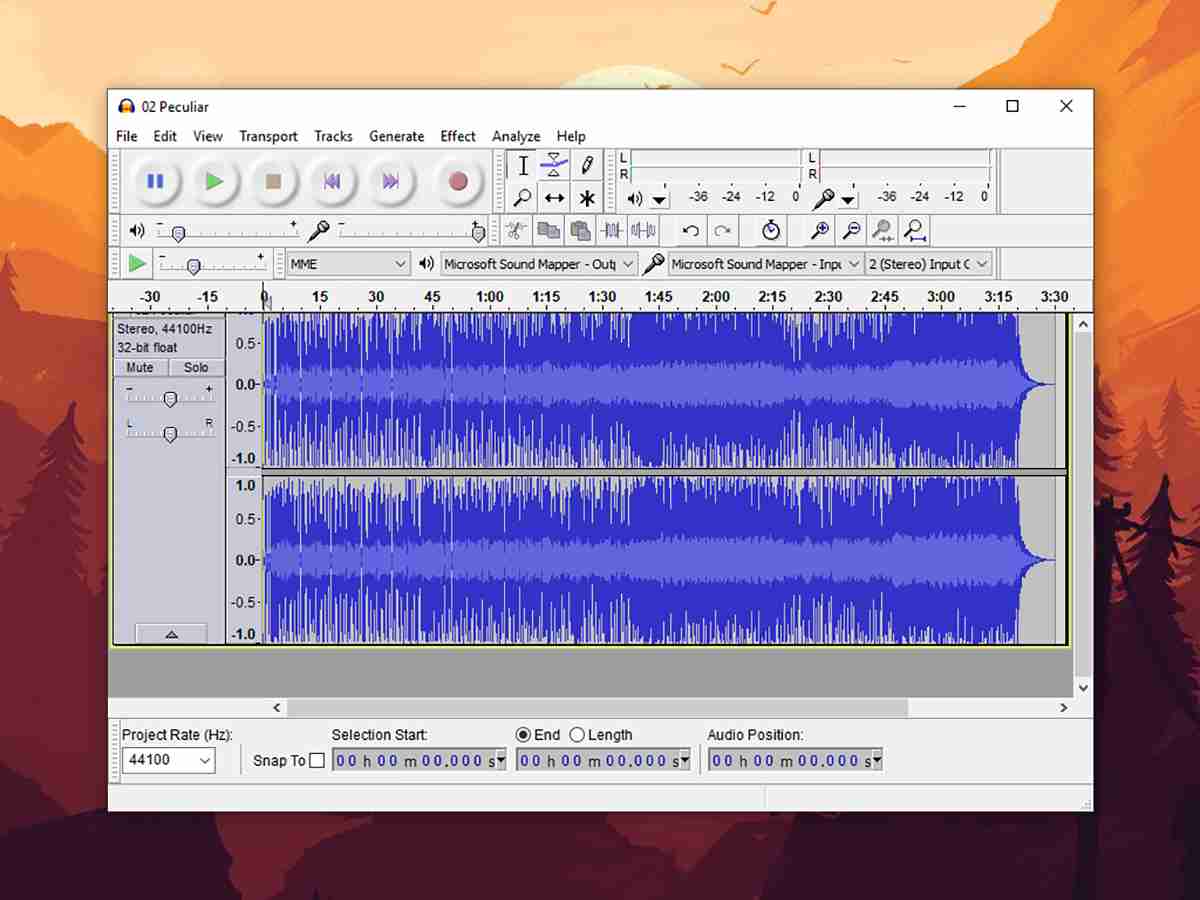
Your smartphone can use almost any sound as a ringtone or notification. First, acquire your audio: record a new clip using a voice recording app (like Voice Recorder for Android or Voice Record Pro for iOS), extract a segment from a song or video using an audio editor (such as Audacity for Windows/macOS or the online tool Zamzar), or download pre-made sounds from a ringtone app (Ringtone Maker or Zedge for Android; Ringtone Designer or Zedge for iOS). Convert your audio to MP3 for best compatibility.
Setting Sounds on Android
-
Transfer the Audio: Move your MP3 file to your phone's "Ringtones" (for ringtones) or "Notifications" folder using email, cloud storage (Google Drive, Dropbox), or a direct computer connection. Apps like Dropbox offer a "Save to Device" option to simplify this.
-
Restart Your Phone: A restart ensures the system recognizes the new audio files.
-
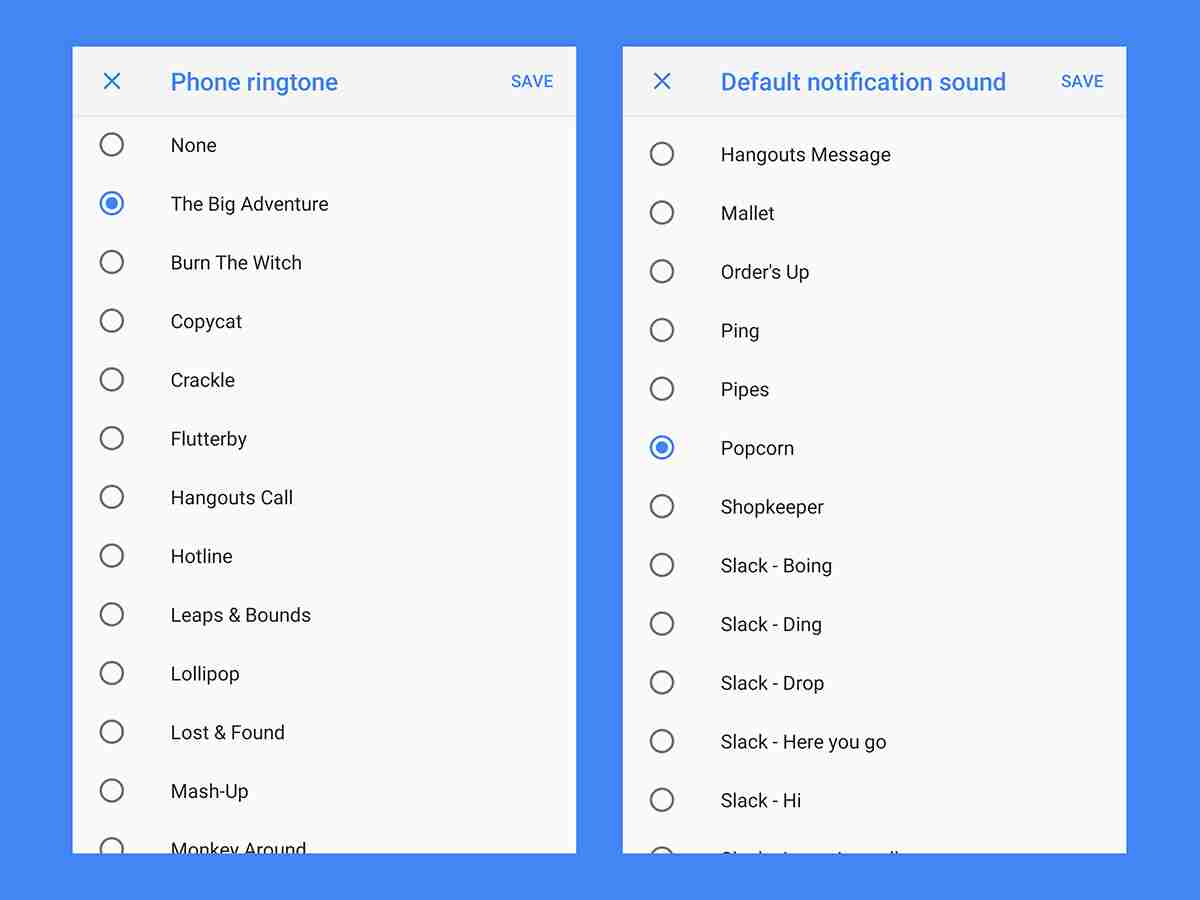
Set Default Ringtone: Go to Settings > Sound > Phone ringtone to choose your new ringtone.
-
Set Custom Ringtones for Contacts: In the Contacts app, select a contact, tap the menu (three dots), and choose Set ringtone.

-
Set Default Notification Sound: Navigate to Settings > Sound > Advanced > Default notification sound to select a default notification sound for all apps.
-
Set App-Specific Notification Sounds: Many apps allow individual notification sound customization. Check each app's settings (e.g., Gmail's Settings > Manage notifications > Advanced > Sound) for this option.
Setting Sounds on iOS

iOS requires a slightly more involved process:
-
Import to iTunes: Add your audio file to your iTunes library (File > Add File to Library).
-
Convert to AAC: Create an AAC version (File > Convert > Create AAC Version). If this option isn't available, adjust your iTunes import settings (Edit > Preferences > General > Import Settings) to select the AAC Encoder. iTunes can also trim audio from existing songs for ringtone creation.
-
Change File Extension: Locate the AAC file using File > Show in Windows Explorer/Finder and change the file extension to .m4r.

-
Sync with iTunes: Connect your iPhone to iTunes, go to the Tones pane, and drag the .m4r file into it.
-
Set Default Sounds: Go to Settings > Sounds & Haptics to set default ringtones and notifications.

-
Set Custom Sounds for Contacts: In the Contacts app, edit a contact and select Ringtone or Text Tone.
-
Set App-Specific Notification Sounds: Go to Settings > Notifications, select an app, and choose a sound under Sounds.
Now you can enjoy personalized sounds that reflect your unique style!
The above is the detailed content of How to make a custom ringtone on Android and iOS. For more information, please follow other related articles on the PHP Chinese website!

Hot AI Tools

Undress AI Tool
Undress images for free

Undresser.AI Undress
AI-powered app for creating realistic nude photos

AI Clothes Remover
Online AI tool for removing clothes from photos.

Clothoff.io
AI clothes remover

Video Face Swap
Swap faces in any video effortlessly with our completely free AI face swap tool!

Hot Article
Hot Tools

Notepad++7.3.1
Easy-to-use and free code editor

SublimeText3 Chinese version
Chinese version, very easy to use

Zend Studio 13.0.1
Powerful PHP integrated development environment

Dreamweaver CS6
Visual web development tools

SublimeText3 Mac version
God-level code editing software (SublimeText3)
Hot Topics


 How to Fix KB5060829 Not Installing & Other Reported Bugs
Jun 30, 2025 pm 08:02 PM
How to Fix KB5060829 Not Installing & Other Reported Bugs
Jun 30, 2025 pm 08:02 PM
Many users encountered installation issues and some unexpected problems after applying the Windows 11 update KB5060829. If you're facing similar difficulties, don't panic. This MiniTool guide presents the most effective fixes to resolve KB5060829 not
 Cannot Fix Update KB5060999 Not Installing on Windows 11?
Jun 23, 2025 pm 08:03 PM
Cannot Fix Update KB5060999 Not Installing on Windows 11?
Jun 23, 2025 pm 08:03 PM
KB5060999 What are the update contents of Windows 11 23H2? How to download? What to do if the update fails? This article will be described in detail and provides a solution to the failure of KB5060999 installation. Quick Navigation :- Windows 11 23H2 KB5060999 Updated Content - KB5060999 Reason for installation failure - Solve the problem that KB506099 cannot be installed - Summary of Windows 11 23H2 KB5060999 Update KB5060999 is a cumulative security update for Windows 11 released by Microsoft on June 10, 2025
 Windows Security is blank or not showing options
Jul 07, 2025 am 02:40 AM
Windows Security is blank or not showing options
Jul 07, 2025 am 02:40 AM
When the Windows Security Center is blank or the function is missing, you can follow the following steps to check: 1. Confirm whether the system version supports full functions, some functions of the Home Edition are limited, and the Professional Edition and above are more complete; 2. Restart the SecurityHealthService service to ensure that its startup type is set to automatic; 3. Check and uninstall third-party security software that may conflict; 4. Run the sfc/scannow and DISM commands to repair system files; 5. Try to reset or reinstall the Windows Security Center application, and contact Microsoft support if necessary.
 Spotlight on Windows 10 KB5061087 & Fixes for Not Installing
Jun 30, 2025 pm 08:03 PM
Spotlight on Windows 10 KB5061087 & Fixes for Not Installing
Jun 30, 2025 pm 08:03 PM
Microsoft has released Windows 10 KB5061087 for 22H2 to fix some issues. From this post on MiniTool, learn how to install this preview optional update on your PC. Also, you can know what to do if KB5061087 fails to install via Windows Update.Quick Na
 Windows can't access shared folder on network
Jun 30, 2025 pm 04:56 PM
Windows can't access shared folder on network
Jun 30, 2025 pm 04:56 PM
When encountering the "Windowscan'taccesssharedfolderonnetwork", you can usually solve the problem through the following steps: 1. Turn on the network discovery and file sharing function and turn off password protection; 2. Make sure that the target computer is enabled to share and set the correct permissions; 3. Check the firewall rules and service status to ensure that it allows shared access; 4. Use the credential manager to add network credentials for long-term and stable connection.
 Windows 'Getting Windows ready, Don't turn off your computer' stuck
Jun 30, 2025 pm 05:18 PM
Windows 'Getting Windows ready, Don't turn off your computer' stuck
Jun 30, 2025 pm 05:18 PM
When you encounter Windows stuck in the "GettingWindowsready, Don't turnoff your computer" interface, you should first confirm whether it is really stuck; 1. Observe whether the hard disk indicator light is flashing, 2. Check whether the fan sound has changed, 3. Wait at least 30 to 60 minutes to ensure that the system has enough time to complete the update operation.
 Windows clipboard history not working
Jun 30, 2025 pm 05:14 PM
Windows clipboard history not working
Jun 30, 2025 pm 05:14 PM
When the Windows clipboard history is not working, you can check the following steps: 1. Confirm that the clipboard history function is enabled, the path is "Settings>System>Clipboard", and if it is not enabled, Win V will not respond; 2. Check whether the copy content type is limited, such as large images, special formats or file paths may not be saved; 3. Ensure that the system version supports it, Windows 101809 and above, and some enterprise versions or LTSC do not support it; 4. Try to restart the ClipboardUserService service or end the clipups.exe process; 5. Clear the clipboard cache or reset the settings, close and then turn on the "Clipboard History" or run the "echooff|clip" command to clean up the cache
 Bug Solved - Dolby Vision Stuck Enabled on Windows 11
Jun 26, 2025 pm 08:06 PM
Bug Solved - Dolby Vision Stuck Enabled on Windows 11
Jun 26, 2025 pm 08:06 PM
If you are experiencing Dolby Vision stuck enabled on Windows 11, you are not alone. This Dolby Vision color bug is affecting a wide range of devices. In this MiniTool guide, I will show you how to fix this problem effectively.Quick Navigation :- Dol
