


Core points
- Monkey patch (MP) in JavaScript is a technology that allows programmers to override, extend, or suppress the default behavior of code segments without changing their original source code.
- While MP is often considered a bad practice, it can be used as a useful tool for modifying third-party code to suit specific needs, especially if the original source code cannot be changed.
- MP can be used to overwrite existing functions with custom behavior, enhance methods by adding custom behavior before or after the original code, or intercepting Ajax calls to modify their behavior.
- MP should be used with caution, as it can cause unpredictable behavior and conflicts in the code, especially if patched methods are used elsewhere in the code base.
- Despite potential risks, MP can still be a powerful tool for testing, debugging, and implementing repairs, highlighting the flexibility and dynamic nature of JavaScript as a programming language.
This article was reviewed by Moritz Kr?ger and Tom Greco. Thanks to all the peer reviewers at SitePoint for getting SitePoint content to its best!
Have you ever used third-party code that works well except for one small question that drives you crazy? Why did the creator forget to delete those annoying console logs? Wouldn't that be nice if that API call could do one more thing? If so, then you know that having the maintainer implement your changes can be difficult (or impossible). But, what about changing the code yourself? What if you don't have source code and don't want to host them yourself? Welcome to the world journey of JavaScript Monkey Patch!
In this article, we will learn what a monkey patch is and step through some different examples to use it to change the functionality of a third-party widget to suit our needs.
What is a monkey patch?
Monkey patch (MP) is a technique used to override, extend, and even suppress the default behavior of code segments without changing its original source code. This is done by replacing the original behavior with the fix version.
This article will use the existing feedback box widget that displays a simple, swipable pop-up window (shown in the image below) containing the feedback form.
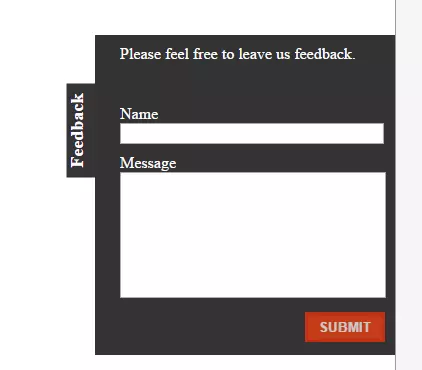
The source code has been modified to include use cases for use as MP targets. The goal refers to the specific functions, features or minimum level usage we will patch. Another modification I made was to remove the call function expression (IIFE) around the code. This is done to focus on MP technology.
You can find the entire example in Plunker, including the monkey patch discussed in this article.
Isn't monkey patch a bad practice?
Before we start, let's make it clear: Yes, MP is considered a bad practice—evileval, imperative programming, variable data structures, two-way binding So is wait.
If you use either of these, there is a very likely a fairly large group of people telling you that you are doing something wrong and that this or that should be changed to fit better conditions. But as always, there are different tools and technologies available, and their applicability varies in specific scenarios. Sometimes, something that looks extreme, crazy, or simply bad can be a last resort in a particular situation. Unfortunately, since some practices are considered bad, you can't even find many articles to describe how to do the wrong thing in the right way. The situation described here may be unnatural, push it to the extreme with fake widgets to show your choice. Then, as a reader, you have to decide whether you like what you see. If nothing else, after reading this article, you will have a better understanding in order to object to MP.
Target of monkey patchBefore we dig deeper into these technologies, let's first check out what we want to achieve. The modified widget has some code odor, and we want to solve these problems.
Hardcoded background color
The first is a method called toggleError, which should change the background color of the element based on the boolean parameter
As you can see, it sets the background-color property via the jQuery method css. This is a problem because we want to specify it through stylesheet rules.
FeedbackBox.prototype.toggleError = function(obj, isError) {
  if(isError) {
    obj.css("background-color", "darkgrey");
  } else {
    obj.css("background-color", "");
  }
}
Nevil console log
When developing widgets, use the console log to prompt the developer for what is currently executing. This may be a good approach during development, but it is certainly not the best approach in production use. So we need to find a way to remove all these debug statements.
Block ad server call
The widget is great, but it has a weird behavior. Each time the script is initialized, it makes a request to a weird ad server and displays unnecessary bloat content on our page.
FeedbackBox.prototype.init = function() {
  // 我們想要跳過(guò)的廣告服務(wù)器調(diào)用
  $.ajax('vendor/service.json', {
    method: 'GET'
  }).then(function(data) {
    console.log("FeedbackBox: AdServer contacted");
  });

  ...
Note: The demo code simulates outgoing Ajax requests for JSON files in Plunker, but I hope you understand this. Coverage method
One of the key concepts of MP is to get existing functions and enhance them before or after calling the original code using custom behavior. But calling the original implementation is not always necessary, because sometimes you just want to replace it with custom actions. This approach is great for helping us solve the problem of hard-coded background color.
The location where the MP is applied must be loaded and provided with the original implementation. Generally, you should strive to get the changes as close to your goal as possible, but remember that the implementation of the goal may change over time. As for our example, initialization and MP will go to the file main.js.
Looking at the widget implementation, we can see that there is a FeedbackBox object as the root of the widget. Later, the toggleError function will be implemented on its prototype.
FeedbackBox.prototype.toggleError = function(obj, isError) {
  if(isError) {
    obj.css("background-color", "darkgrey");
  } else {
    obj.css("background-color", "");
  }
}
Since JavaScript is a dynamic language whose objects can be modified at runtime, all we will end up doing is replacing toggleError with our custom method. The only thing to note is to keep the signature (name and passed parameters) the same.
FeedbackBox.prototype.init = function() {
  // 我們想要跳過(guò)的廣告服務(wù)器調(diào)用
  $.ajax('vendor/service.json', {
    method: 'GET'
  }).then(function(data) {
    console.log("FeedbackBox: AdServer contacted");
  });

  ...
The new implementation now simply adds an error class to the given element, allowing us to set the background color via css.
Enhancement Method
In the previous example, we saw how to override the original implementation by providing our own methods. On the other hand, processing console logs should just filter out specific calls and suppress them. The key to success is to examine the code you embed and try to understand its workflow. Typically, this is done by launching the developer console in the browser of your choice and peeking through the loaded resources, adding breakpoints, and debugging the object code sections to understand its functionality. However, this time, you just have to open the implementation in the Plunker example called vendor/jquery.feedBackBox.js in another tab.
By looking at the debug messages, we can see that each of them starts with FeedbackBox:. So, an easy way to achieve what we want is to intercept the original call, check the provided text to be written, and call the original method only if it does not contain a debug prompt.
To do this, let's first store the original console.log in a variable for later use. Then again, we override the original implementation with our custom implementation, which first checks if the provided property text is a string type, and if so, checks if it contains the substring FeedbackBox:. If so, we will do nothing, otherwise we will execute the original console code by calling its apply method.
Note that this method takes the context as the first parameter, which means that the method should be called on that object, as well as a magic argument variable. The latter is an array of all the parameters originally passed to the original console.log call.
function FeedbackBox(elem, options) {
  this.options = options;
  this.element = elem;
  this.isOpen = false;
}

FeedbackBox.prototype.toggleError = function(obj, isError) {
  ...
}
Note: You may be wondering why we did not simply forward the text attribute. Well, console.log can actually be called with infinite parameters, which eventually will be connected to a single text output. So instead of defining all these parameters (which can be very difficult for infinite possibilities), we just forward all the incoming content.
Intercept Ajax calls
Last but not least, let's see how to solve the ad server problem. Let's look at the widget's init function again:
FeedbackBox.prototype.toggleError = function(obj, isError) {
  if(isError) {
    obj.css("background-color", "darkgrey");
  } else {
    obj.css("background-color", "");
  }
}
The first idea might be to open a browser and search for how to override the jQuery plugin. Depending on how good your search skills are, you may or may not find the right answer. But let's stop and think about what's going on here. No matter what jQuery does to its ajax method, it ends up creating a native XMLHttpRequest at some point.
Let's see how it works behind the scenes. The simplest example found on MDN shows us this:
FeedbackBox.prototype.init = function() {
  // 我們想要跳過(guò)的廣告服務(wù)器調(diào)用
  $.ajax('vendor/service.json', {
    method: 'GET'
  }).then(function(data) {
    console.log("FeedbackBox: AdServer contacted");
  });

  ...
We see a new XMLHttpRequest instance created. It has an onreadystatechange method that we don't actually care about, and then the open and send methods. Very good. So our idea is to patch the send method and tell it not to perform calls to a specific URL.
function FeedbackBox(elem, options) {
  this.options = options;
  this.element = elem;
  this.isOpen = false;
}

FeedbackBox.prototype.toggleError = function(obj, isError) {
  ...
}
OK, it turns out that you can't get the target URL from the object itself. Oops. Then what should we do? We put it on the object. Looking for the first chance to get the URL, we can see that the open method accepts it as the second parameter. To make the URL available in the object itself, let's start by MP open method.
As before, we store the original open method in a variable for later use. Then we override the original implementation with a custom implementation. Since we can use JavaScript (a dynamic language), we can create a new property at any time and name it _url, which will be set to the value of the passed parameter.
FeedbackBox.prototype.toggleError = function(obj, isError) {
  if(isError) {
    obj.addClass("error");
  } else {
    obj.removeClass("error");
  }
};
Apart from this, we call the original open method without doing any other operations.
Revisiting our send MP, it's obvious now how to resolve the condition check. The following is the modified version:
var originalConsoleLog = console.log;
console.log = function(text) {
  if (typeof text === "string" && text.indexOf("FeedbackBox:") === 0) {
    return;
  }

  originalConsoleLog.apply(console, arguments);
}
Conclusion
What we see here is a brief introduction about changing the behavior of code at runtime using monkey patches. But more importantly, I hope this post will give you an idea of ??how to deal with monkey patches. While the patch itself is usually simple, it is important to have the idea of ??how to adjust the code at runtime.
Also, I hope that no matter what you think of monkey patches, you have the opportunity to see the beauty of using dynamic languages, which allows you to dynamically change even native implementations at runtime.
FAQs about Practical Monkey Patch (FAQ)
What is the concept of monkey patch in JavaScript?
Monkey patches in JavaScript are a technique in which the behavior of built-in or user-defined objects is modified, usually by adding, modifying, or changing the prototype of the object. This is a way to extend or change the behavior of the code without changing the original source code. This technique can be used to implement repair, enhance existing functions, and even for testing and debugging purposes.
What is the difference between monkey patches in JavaScript and Python?
While the concept of monkey patches in JavaScript and Python is the same - the behavior of modifying or extending objects - the implementation is different due to differences in the language itself. In JavaScript, monkey patches are usually done by modifying the prototype of an object, while in Python, it is done by adding or changing a class or instance method. The flexibility of both languages ??allows for monkey patching, but this technique should be used with caution to avoid unexpected behavior.
Is monkey patch considered a good practice in JavaScript?
The Monkey Patch is a powerful tool, but it is not without controversy. While it can quickly modify or extend features without changing the original source code, it can also lead to unpredictable behavior and conflicts, especially when overuse or inappropriate. Therefore, it is often recommended to use monkey patches with caution and responsibility, and always consider the potential impact on the entire code base.
What are the potential risks of monkey patches?
The main risk of monkey patch is that it can lead to unpredictable behavior and conflict in the code. Because it modifies the behavior of existing objects, it can break the code if a patched method is used elsewhere in the code base. It can also cause confusion among other developers who may not be aware of the modifications. Therefore, it is important to record any monkey patches clearly and comprehensively.
How to cleanly patch a function in JavaScript?
To cleanly patch a function in JavaScript, you can create a wrapper around the original function. This wrapper function will call the original function and then add or modify the behavior as needed. In this way, the original function remains unchanged and the additional behavior is clearly separated, making the code easier to understand and maintain.
Can monkey patches be used for testing and debugging?
Yes, monkey patches can be used as a useful tool for testing and debugging. By modifying or extending the behavior of a function or method, you can simulate different scenarios, inject errors, or add logs to track the execution of your code. However, it is important to remove or isolate these patches in production code to avoid any unexpected side effects.
What role does the prototype play in monkey patches in JavaScript?
In JavaScript, prototypes play a crucial role in monkey patches. Since JavaScript is a prototype-based language, each object has a prototype that inherits properties and methods from it. By modifying the prototype of an object, you can change the behavior of all instances of that object. This is the basis for monkey patches in JavaScript.
How does monkey patch affect performance in JavaScript?
The impact of monkey patches on JavaScript performance is usually small. However, excessive or improper use of monkey patches can cause performance problems. For example, if you frequently use patched methods in your code, additional behavior may slow down execution. Therefore, be sure to use monkey patches with caution and monitor performance regularly.
Can monkey patches be used to extend built-in JavaScript objects?
Yes, the monkey patch can be used to extend built-in JavaScript objects. By modifying the prototype of the built-in object, you can add new methods or properties that will be available for all instances of the object. However, this should be done with caution to avoid conflicts with future versions of JavaScript, which may introduce the same methods or properties.
What are some alternatives to monkey patches in JavaScript?
There are several alternatives to monkey patches in JavaScript. A common way is to use combinations, where you create a new object that contains the original object and add or overwrite the behavior. Another way is to use inheritance, where you create a new class that inherits from the original class and overwrites the method. These methods can provide similar flexibility to monkey patches, but with better encapsulation and less risk of conflict.
The above is the detailed content of Pragmatic Uses of Monkey Patching in JavaScript. For more information, please follow other related articles on the PHP Chinese website!

Hot AI Tools

Undress AI Tool
Undress images for free

Undresser.AI Undress
AI-powered app for creating realistic nude photos

AI Clothes Remover
Online AI tool for removing clothes from photos.

Clothoff.io
AI clothes remover

Video Face Swap
Swap faces in any video effortlessly with our completely free AI face swap tool!

Hot Article
Hot Tools

Notepad++7.3.1
Easy-to-use and free code editor

SublimeText3 Chinese version
Chinese version, very easy to use

Zend Studio 13.0.1
Powerful PHP integrated development environment

Dreamweaver CS6
Visual web development tools

SublimeText3 Mac version
God-level code editing software (SublimeText3)
Hot Topics


 How to work with dates and times in js?
Jul 01, 2025 am 01:27 AM
How to work with dates and times in js?
Jul 01, 2025 am 01:27 AM
The following points should be noted when processing dates and time in JavaScript: 1. There are many ways to create Date objects. It is recommended to use ISO format strings to ensure compatibility; 2. Get and set time information can be obtained and set methods, and note that the month starts from 0; 3. Manually formatting dates requires strings, and third-party libraries can also be used; 4. It is recommended to use libraries that support time zones, such as Luxon. Mastering these key points can effectively avoid common mistakes.
 Why should you place tags at the bottom of the ?
Jul 02, 2025 am 01:22 AM
Why should you place tags at the bottom of the ?
Jul 02, 2025 am 01:22 AM
PlacingtagsatthebottomofablogpostorwebpageservespracticalpurposesforSEO,userexperience,anddesign.1.IthelpswithSEObyallowingsearchenginestoaccesskeyword-relevanttagswithoutclutteringthemaincontent.2.Itimprovesuserexperiencebykeepingthefocusonthearticl
 What is event bubbling and capturing in the DOM?
Jul 02, 2025 am 01:19 AM
What is event bubbling and capturing in the DOM?
Jul 02, 2025 am 01:19 AM
Event capture and bubble are two stages of event propagation in DOM. Capture is from the top layer to the target element, and bubble is from the target element to the top layer. 1. Event capture is implemented by setting the useCapture parameter of addEventListener to true; 2. Event bubble is the default behavior, useCapture is set to false or omitted; 3. Event propagation can be used to prevent event propagation; 4. Event bubbling supports event delegation to improve dynamic content processing efficiency; 5. Capture can be used to intercept events in advance, such as logging or error processing. Understanding these two phases helps to accurately control the timing and how JavaScript responds to user operations.
 How can you reduce the payload size of a JavaScript application?
Jun 26, 2025 am 12:54 AM
How can you reduce the payload size of a JavaScript application?
Jun 26, 2025 am 12:54 AM
If JavaScript applications load slowly and have poor performance, the problem is that the payload is too large. Solutions include: 1. Use code splitting (CodeSplitting), split the large bundle into multiple small files through React.lazy() or build tools, and load it as needed to reduce the first download; 2. Remove unused code (TreeShaking), use the ES6 module mechanism to clear "dead code" to ensure that the introduced libraries support this feature; 3. Compress and merge resource files, enable Gzip/Brotli and Terser to compress JS, reasonably merge files and optimize static resources; 4. Replace heavy-duty dependencies and choose lightweight libraries such as day.js and fetch
 A definitive JS roundup on JavaScript modules: ES Modules vs CommonJS
Jul 02, 2025 am 01:28 AM
A definitive JS roundup on JavaScript modules: ES Modules vs CommonJS
Jul 02, 2025 am 01:28 AM
The main difference between ES module and CommonJS is the loading method and usage scenario. 1.CommonJS is synchronously loaded, suitable for Node.js server-side environment; 2.ES module is asynchronously loaded, suitable for network environments such as browsers; 3. Syntax, ES module uses import/export and must be located in the top-level scope, while CommonJS uses require/module.exports, which can be called dynamically at runtime; 4.CommonJS is widely used in old versions of Node.js and libraries that rely on it such as Express, while ES modules are suitable for modern front-end frameworks and Node.jsv14; 5. Although it can be mixed, it can easily cause problems.
 How to make an HTTP request in Node.js?
Jul 13, 2025 am 02:18 AM
How to make an HTTP request in Node.js?
Jul 13, 2025 am 02:18 AM
There are three common ways to initiate HTTP requests in Node.js: use built-in modules, axios, and node-fetch. 1. Use the built-in http/https module without dependencies, which is suitable for basic scenarios, but requires manual processing of data stitching and error monitoring, such as using https.get() to obtain data or send POST requests through .write(); 2.axios is a third-party library based on Promise. It has concise syntax and powerful functions, supports async/await, automatic JSON conversion, interceptor, etc. It is recommended to simplify asynchronous request operations; 3.node-fetch provides a style similar to browser fetch, based on Promise and simple syntax
 What are best practices for writing clean and maintainable JavaScript code?
Jun 23, 2025 am 12:35 AM
What are best practices for writing clean and maintainable JavaScript code?
Jun 23, 2025 am 12:35 AM
To write clean and maintainable JavaScript code, the following four points should be followed: 1. Use clear and consistent naming specifications, variable names are used with nouns such as count, function names are started with verbs such as fetchData(), and class names are used with PascalCase such as UserProfile; 2. Avoid excessively long functions and side effects, each function only does one thing, such as splitting update user information into formatUser, saveUser and renderUser; 3. Use modularity and componentization reasonably, such as splitting the page into UserProfile, UserStats and other widgets in React; 4. Write comments and documents until the time, focusing on explaining the key logic and algorithm selection
 var vs let vs const: a quick JS roundup explainer
Jul 02, 2025 am 01:18 AM
var vs let vs const: a quick JS roundup explainer
Jul 02, 2025 am 01:18 AM
The difference between var, let and const is scope, promotion and repeated declarations. 1.var is the function scope, with variable promotion, allowing repeated declarations; 2.let is the block-level scope, with temporary dead zones, and repeated declarations are not allowed; 3.const is also the block-level scope, and must be assigned immediately, and cannot be reassigned, but the internal value of the reference type can be modified. Use const first, use let when changing variables, and avoid using var.
