


While filling the forms in a browser, it is important to provide flexibility to the user to perform multiple operations on a web form. One of a special type button known as reset allows to reset the values in form entered by the user. This button gives the flexibility to perform the reset operation to the user. This button basically wipes out whatever the user has entered the data on the same form. After reset, the form will be populated with default values. This article will see the usage of the reset button in multiple scenarios and how it is used.
Syntax of HTML Reset Button
The reset operation can be defined on tag or a
1. Input Tag
Syntax:
<input type = "reset">
Here, Input is a tag used to define the Input element, and type is an attribute used to define the type of input element. The value reset is one of the values that can be passed to this attribute.
2. Button Tag
Syntax:
<button type = "reset">
The reset is one of the values that can be passed to the Button element’s type attribute. This will reset the form, as said earlier. The other two values supported by this tag are “button” and “submit”.
Examples to Implement HTML Reset Button
Below are the examples of HTML Reset Button:
Example #1 – Reset button using Input Tag
Code:
<!DOCTYPE html>
<html>
<head>
<title>
Reset button in HTML
</title>
<style>
.form-data {
border : #81D4FA 2px solid;
background-color : #03a9f400;
text-align : left;
padding-left : 20px;
height : 450px;
width : 95%;
}
.form {
margin:5px auto;
max-width: 700px;
padding: 25px 15px 15px 25px;
}
.form li {
margin: 12px 0 0 0;
list-style: none;
}
.form label {
margin: 0 0 3px 0;
padding: 0px;
display: block;
font-weight: bold;
}
.form .field {
width: 80%;
height: 20px;
}
.form input[ type = submit], .form input[ type = reset] {
background: #2196F3;
padding: 10px 17px 10px 17px;
margin-right: 10px;
color: #fff;
border: none;
}
.form input[type = submit]:hover, .form input[ type = reset]:hover {
background: #2173f3;
}
.heading {
font-weight: bold;
border-bottom: 2px solid #ddd;
font-size: 15px;
width: 98%;
}
</style>
</head>
<body>
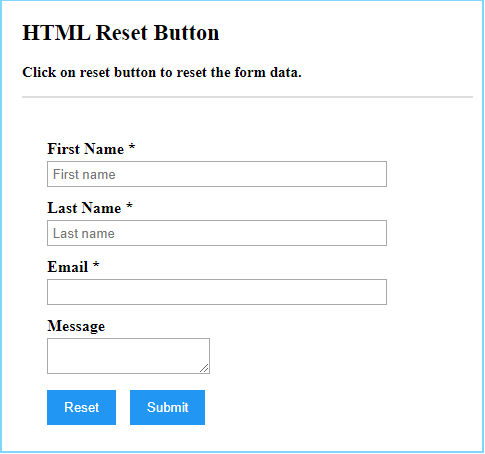
<div class = "form-data">
<div class = "heading">
<h2> HTML Reset Button </h2>
<p> Click on reset button to reset the form data. </p>
</div>
<div>
<form action = "#" >
<ul class = "form" >
<li>
<label> First Name <span class = "required"> * </span></label>
<input type = "text" name = "firstName" placeholder = " First name" class = "field"/>
</li>
<li>
<label> Last Name <span class = "required"> * </span></label>
<input type = "text" name = "lastName" placeholder = " Last name" class = "field" />
</li>
<li>
<label> Email <span class = "required" > * </span></label>
<input type="email" name="field3" class="field" />
</li>
<li>
<label> Message </label>
<textarea name = "message" id = "message" class = "field-message"></textarea>
</li>
<li>
<input type = "reset" value = "Reset">
<input type = "submit" value = "Submit" />
</li>
</ul>
</form>
</div>
</div>
<script type = "text/javascript">
</script>
</body>
</html>
Output:

Try typing in the input boxes, and without a refreshing click on the reset button, the data entered will be wiped away. Note that for doing a reset, we don’t need to refresh the page; the data will be cleared dynamically on the same loaded page.
Example #2 – Reset Button using Button Tag
Code:
<!DOCTYPE html>
<html>
<head>
<title>
Reset button in HTML
</title>
<style>
.form-data {
border : #81D4FA 2px solid;
background-color : #03a9f400;
text-align : left;
padding-left : 20px;
height : 450px;
width : 95%;
}
.form {
margin:5px auto;
max-width: 700px;
padding: 25px 15px 15px 25px;
}
.form li {
margin: 12px 0 0 0;
list-style: none;
}
.form label {
margin: 0 0 3px 0;
padding: 0px;
display: block;
font-weight: bold;
}
.form .field {
width: 80%;
height: 20px;
}
.form button[ type = submit], .form button[ type = reset] {
background: #2196F3;
padding: 10px 17px 10px 17px;
margin-right: 10px;
color: #fff;
border: none;
}
.form button[type = submit]:hover, .form button[ type = reset]:hover {
background: #2173f3;
}
.heading {
font-weight: bold;
border-bottom: 2px solid #ddd;
font-size: 15px;
width: 98%;
}
</style>
</head>
<body>
<div class = "form-data">
<div class = "heading">
<h2> HTML Reset Button </h2>
<p> Click on reset button to reset the form data. </p>
</div>
<div>
<form action = "#" >
<ul class = "form" >
<li>
<label> First Name <span class = "required"> * </span></label>
<input type = "text" name = "firstName" placeholder = " First name" class = "field"/>
</li>
<li>
<label> Last Name <span class = "required"> * </span></label>
<input type = "text" name = "lastName" placeholder = " Last name" class = "field" />
</li>
<li>
<label> Email <span class = "required" > * </span></label>
<input type="email" name="field3" class="field" />
</li>
<li>
<label> Message </label>
<textarea name = "message" id = "message" class = "field-message"></textarea>
</li>
<li>
<button type = "reset" value = "Reset"> Reset </button>
<button type = "submit" value = "Submit"> Submit </button>
</li>
</ul>
</form>
</div>
</div>
<script type = "text/javascript">
</script>
</body>
</html>
Output:?
Conclusion
The HTML reset button provides a powerful feature to reset the data typed in form automatically without refreshing the web page. The reset button is normally used inside the form element.
The above is the detailed content of HTML Reset Button. For more information, please follow other related articles on the PHP Chinese website!

Hot AI Tools

Undress AI Tool
Undress images for free

Undresser.AI Undress
AI-powered app for creating realistic nude photos

AI Clothes Remover
Online AI tool for removing clothes from photos.

Clothoff.io
AI clothes remover

Video Face Swap
Swap faces in any video effortlessly with our completely free AI face swap tool!

Hot Article
Hot Tools

Notepad++7.3.1
Easy-to-use and free code editor

SublimeText3 Chinese version
Chinese version, very easy to use

Zend Studio 13.0.1
Powerful PHP integrated development environment

Dreamweaver CS6
Visual web development tools

SublimeText3 Mac version
God-level code editing software (SublimeText3)
Hot Topics


 What are the essential HTML elements for structuring a webpage?
Jul 03, 2025 am 02:34 AM
What are the essential HTML elements for structuring a webpage?
Jul 03, 2025 am 02:34 AM
The web page structure needs to be supported by core HTML elements. 1. The overall structure of the page is composed of , , which is the root element, which stores meta information and displays the content; 2. The content organization relies on title (-), paragraph () and block tags (such as ,) to improve organizational structure and SEO; 3. Navigation is implemented through and implemented, commonly used organizations are linked and supplemented with aria-current attribute to enhance accessibility; 4. Form interaction involves , , and , to ensure the complete user input and submission functions. Proper use of these elements can improve page clarity, maintenance and search engine optimization.
 Declaring the correct HTML5 doctype for modern pages.
Jul 03, 2025 am 02:35 AM
Declaring the correct HTML5 doctype for modern pages.
Jul 03, 2025 am 02:35 AM
Doctype is a statement that tells the browser which HTML standard to use to parse the page. Modern web pages only need to be written at the beginning of the HTML file. Its function is to ensure that the browser renders the page in standard mode rather than weird mode, and must be located on the first line, with no spaces or comments in front of it; there is only one correct way to write it, and it is not recommended to use old versions or other variants; other such as charset, viewport, etc. should be placed in part.
 How to group options within a select dropdown using html?
Jul 04, 2025 am 03:16 AM
How to group options within a select dropdown using html?
Jul 04, 2025 am 03:16 AM
Use tags in HTML to group options in the drop-down menu. The specific method is to wrap a group of elements and define the group name through the label attribute, such as: 1. Contains options such as apples, bananas, oranges, etc.; 2. Contains options such as carrots, broccoli, etc.; 3. Each is an independent group, and the options within the group are automatically indented. Notes include: ① No nesting is supported; ② The entire group can be disabled through the disabled attribute; ③ The style is restricted and needs to be beautified in combination with CSS or third-party libraries; plug-ins such as Select2 can be used to enhance functions.
 Integrating CSS and JavaScript effectively with HTML5 structure.
Jul 12, 2025 am 03:01 AM
Integrating CSS and JavaScript effectively with HTML5 structure.
Jul 12, 2025 am 03:01 AM
HTML5, CSS and JavaScript should be efficiently combined with semantic tags, reasonable loading order and decoupling design. 1. Use HTML5 semantic tags, such as improving structural clarity and maintainability, which is conducive to SEO and barrier-free access; 2. CSS should be placed in, use external files and split by module to avoid inline styles and delayed loading problems; 3. JavaScript is recommended to be introduced in front, and use defer or async to load asynchronously to avoid blocking rendering; 4. Reduce strong dependence between the three, drive behavior through data-* attributes and class name control status, and improve collaboration efficiency through unified naming specifications. These methods can effectively optimize page performance and collaborate with teams.
 Implementing Clickable Buttons Using the HTML button Element
Jul 07, 2025 am 02:31 AM
Implementing Clickable Buttons Using the HTML button Element
Jul 07, 2025 am 02:31 AM
To use HTML button elements to achieve clickable buttons, you must first master its basic usage and common precautions. 1. Create buttons with tags and define behaviors through type attributes (such as button, submit, reset), which is submitted by default; 2. Add interactive functions through JavaScript, which can be written inline or bind event listeners through ID to improve maintenance; 3. Use CSS to customize styles, including background color, border, rounded corners and hover/active status effects to enhance user experience; 4. Pay attention to common problems: make sure that the disabled attribute is not enabled, JS events are correctly bound, layout occlusion, and use the help of developer tools to troubleshoot exceptions. Master this
 Submitting Form Data Using New HTML5 Methods (FormData)
Jul 08, 2025 am 02:28 AM
Submitting Form Data Using New HTML5 Methods (FormData)
Jul 08, 2025 am 02:28 AM
It is more convenient to submit form data using HTML5's FormData API. 1. It can automatically collect form fields with name attribute or manually add data; 2. It supports submission in multipart/form-data format through fetch or XMLHttpRequest, which is suitable for file upload; 3. When processing files, you only need to append the file to FormData and send a request; 4. Note that the same name field will be overwritten, and JSON conversion and no nesting structure need to be handled.
 Configuring Document Metadata Within the HTML head Element
Jul 09, 2025 am 02:30 AM
Configuring Document Metadata Within the HTML head Element
Jul 09, 2025 am 02:30 AM
Metadata in HTMLhead is crucial for SEO, social sharing, and browser behavior. 1. Set the page title and description, use and keep it concise and unique; 2. Add OpenGraph and Twitter card information to optimize social sharing effects, pay attention to the image size and use debugging tools to test; 3. Define the character set and viewport settings to ensure multi-language support is adapted to the mobile terminal; 4. Optional tags such as author copyright, robots control and canonical prevent duplicate content should also be configured reasonably.
 How to embed content from another site using the html iframe tag?
Jul 04, 2025 am 03:17 AM
How to embed content from another site using the html iframe tag?
Jul 04, 2025 am 03:17 AM
Use tags to embed other website content into your own web page. The basic syntax is:, you can add width, height, and style="border:none;" to control the appearance; in order to achieve responsive layout, you can set the size through percentage or use containers to combine padding and absolute positioning to maintain the aspect ratio, while paying attention to cross-domain restrictions, loading performance, SEO impact, and security policies. Common uses include embedding maps, third-party forms, social media content and internal system integration.
